Ha! Hello clickbaited esk8 nerds.
Right! So it’s time I share my first ever build with everyone! it’s been a bumpy ride. Hell, it was full of potholes tbh but I didn’t burn the house down!
Future reference circa late 2021 @Halbj613
This build didn’t turn out to be what I expected, I’m a bit disappointed. You’ll see.
2019
So what brought me into DIY? I had an evolve, it broke, I started researching and came by this forum… in fact, this forum had only been online for 3 months when I joined. It was back when JP fucked over everyone for the 99th time.
Gosh, haven’t we moved on since then! 
I spent ages doing research. An aspect a lot of people look over when starting a new hobby, or even starting their first hobby ever!
There was so much to learn, from esk8 types, what a vesc was, how the heck the whole electrical and mechanical system even worked!
Mistakes
So after 4 months of reading, I finally pulled the trigger, the trigger of mistake.
Buying second hand
I wanted too many nice things at a good price and suffered a lot because I ended up reselling pretty much everything because it wasn’t appealing to me.
In fact, I reckon I lost about 300 euros in total buying stuff and then selling it again for cheaper.
I think the second mistake was not understanding how tax customs work lol.
Being young and having never ordered from around the world, I didn’t really comprehend.
Well, I learnt the hard way because I lost a lot of money this way too. Unnessaccerily because I could’ve adapted to EU vendors, which is what I resorted to in the end.
My third mistake is to blame on myself. I’m someone who has a hard time being happy with what I created unless it’s the best of the best. And then knowing what to call the best.
The Build

I’m happy to say that this wasn’t just a case of buying all the components and then assembling it, but rather a lot of DIY work with some amazing people to get to the final result!
Let me show
Battery Box
This was a collaboration between @Pedrodemio, @ducktaperules, @tinp123 and @Bavioze.
I loved Pedro’s original enclosure he made for Gathering Storm, a watertight 3d printed enclosure that looked good.


i personally hate the aesthetics of a Peli case.
So we did a remix of it and after many revisions by Pedro and Luuk, I finally had the ideal battery box, or at least the one I had envisioned.
v1


v2 (taller)


v3 (cut and added locking system as to access and service the bms if need be)


v4 (improved locking system and tolerances and better aesthetics. also removed all holes except xt90 and xt30)


We learnt a lot in the process, one being: don’t print in ABS lol. The big versions were printed in a markforged X7 and they still failed and warped horrendously with ABS. PEGT or PLA is the only way.
The bottom plate is a 6mm 6082 Aluminium sheet and the top plate 3mm, all CNC’ed by fabulous @ducktaperules. Then 3 holes were drilled and tapped for M6 on the bottom.


The top alu plate got swapped later for a 6mm polycarbonate laser cut by amazing @SabreDynamics.

The plates are screwed into the enclosure with inserts

and using a soldering iron, you press them into the holes. It’s surprisingly strong, especially with 16 m3 screws holding it into place.

The enclosure fits onto the board quite simply. I have three 5mmTPU risers between the deck and alu plate to allow the board to flex.
3x M6 torx A4 stainless steel screws hold it into place.

ESC box
Nothing that fancy 
i bought a 3DS ESC enclosure for my focboxes but then they died, got some ESCapes, and of course, wasn’t compatible.
I removed the top plate, 3d printed a file that @tinp123 made for the ESCapes, @Bavioze 3d printed the enclosure part and modified it to my requests while also doing some magic 


Motors
my 63100 got the usual treatment of
- bearing upgrades to some NSK DD sealed zoom zoom balls™
- battle hardening with epoxy+microspeares+blue mica powder because why not
- a weird but very effective filter using sandpaper meant for plasterboard. Works extremely well, i surprised my self lol.


Fuck ups - The Ones Not By Me
I had a lot of components fail on me, I’ve been very unlucky. My foxboxes from @Chibatterysystems blew a DRV on my first ride for no apparent reason. My settings were low (first ride), and I was on a flat ride when I got the ABS OVER CURRENT fault.

Bara was indeed kind enough to send back some monies… tho that wasn’t hard given how much money he earns ripping off all those onewheelers looooool.
Still props to him, it covered for half the repair from European wizard @seaborder.
And then my DieBieMS
oh my god fuck the DieBieMS.
i spent 80euro on it? and spent over 100euro fixing problem after problem. components stopped working, things blew up. Just a nightmare overall that I don’t ever wish upon even my worst enemy.
Again thank you @linsus so much for helping me out and fixing it! So much troubleshooting and hours involved. oh god the memories are coming back…
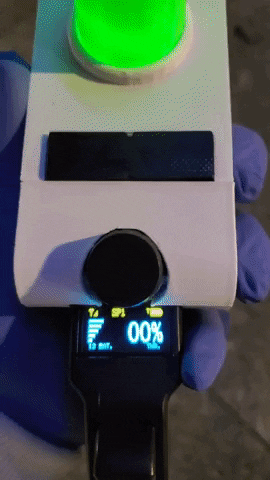
For the sake of god, everyone reading this, just get an LTT smart bms. I have one now and it’s all you ever need. communicates with METR app, shows cell voltage and health over Bluetooth. It really is the only BMS along with @SimosMCmuffin Flexi BMS that’s worth buying. Definitely get a Flexi bms if they are in stock, nothing better exists as of now.
Oh and motors… i had my fair share on motor issues. I won’t nick pick about this too much but my No.1 advice is, when battle hardening, don’t remove the shaft.
If you can get both grub screws out without stripping them, then put them back in without the shaft spinning later on, then you are as lucky as Shelly Woods

Contraversial Wheelchair Crash

Seriously i added 648 loctite, waited 48h, and the shaft skipped like a mf. I had to drill the shaft to make a hole, use drill the grub screw out because that ass hole wasn’t moving with the amount loctite i put, re thread the can, use an m4 grub screw and bang
So do your battle hardening with the shaft in place, it will save you so much trouble.
Builing Pics
Just some random pics and sketches i did to get through my build.


Qwerks and Tricks
I wanted to add a bell to my remote, the Maytech waterproof one.
Having an electric horn was too complicated as i didn’t have a remote receiver with different channels.
So i came up with this super cheap idea that ended up being so practical.
You need
- 1 ‘‘T’’ type bike handle bar extension like this one

- 1 M5/M4 x 10mm flat head screw with it’s nyloc nut

- 4-5mm drill bit


Step 1
When you open up the remote (by removing the 5 screws) you end up with this.

Step 2
This is the hard part.
You basically have to approximately drill the plastic cover so the bolt head sit’s here

The best way to do this is to take a maths compass and use the right screw hole as the center, and make the radius you want, then draw it on the plastic cover, guestimate where on the line you need to drill and voila.
Step 3
Disassemble the T handle until you have only this ( 1 m4 bolt is holding the two parts together)

Drill one cap off centred . This is super important otherwise it will cover the power button lol.
Add the bolt and nut then screw the handle back on the cap.
You don’t have to add a bell, you could add a light or whatever, that’s the coolest thing!


I added I really nice bell made by the bogans down in Straya called the Knog Oi. It has the most amazing ring

!


(yeah I need to change the vinyl as it doesn’t suit at all rn)
Another thing to note is that all the bolts on this board uses
Torx 
Yes, i just earned an instant like from Brian
Just show us the Build ffs
Yes yes well here are the final results


And this is the final version
added led lights with a Bluetooth module… it has 200+ presets!

Thanks to all those that read from top to bottom! Yes, that was a long read hehe. I always try and make my threads exciting and funny to read, including detail on how I did things.
Hopefully, you learned something and enjoyed reading!
And I just want to say a HUGE thanks to the community. I’ve learned so much, thanks to you all, and had such a fun time!
I have more projects soon to come as well so stay tuned!
And I have a special “Thank You” post below to those that really made this build possible 
Cheers and Peace 

– Louis