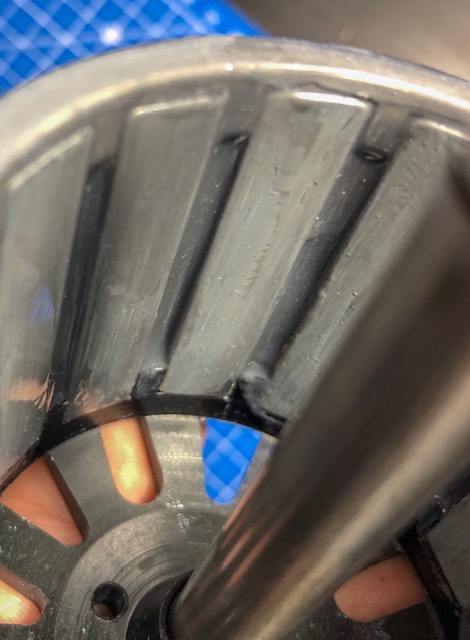
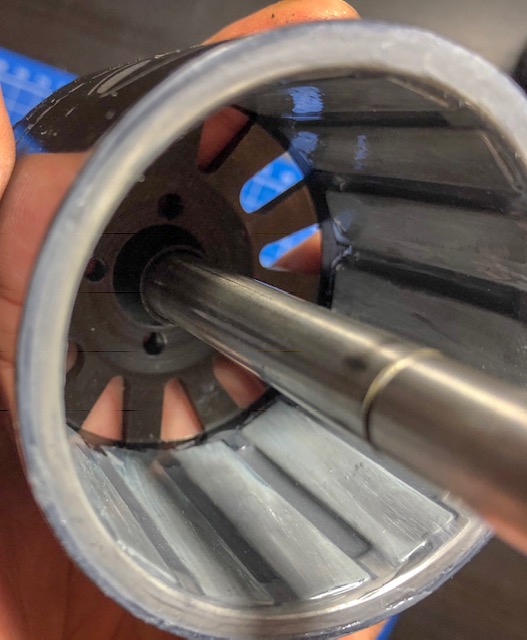
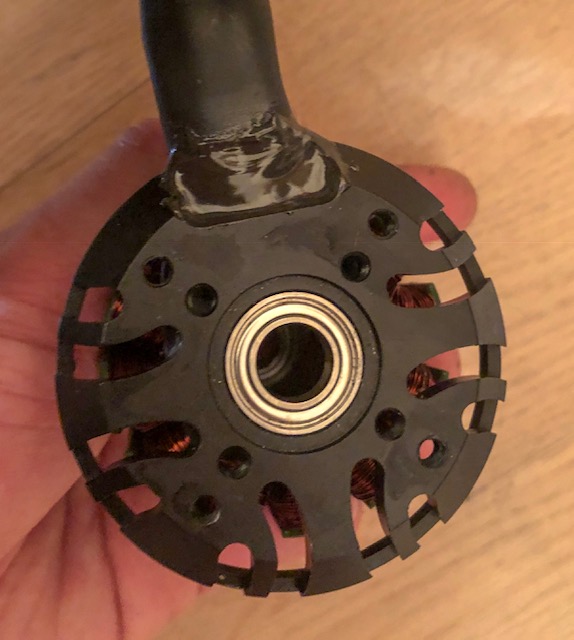
And as promissed here a small “how to battle harden outrunner”
Yes, I had a lot of motors with lose magnets, which most time result in broken magnets as I just realized it when it was too late.
I´m very tired from this picture:
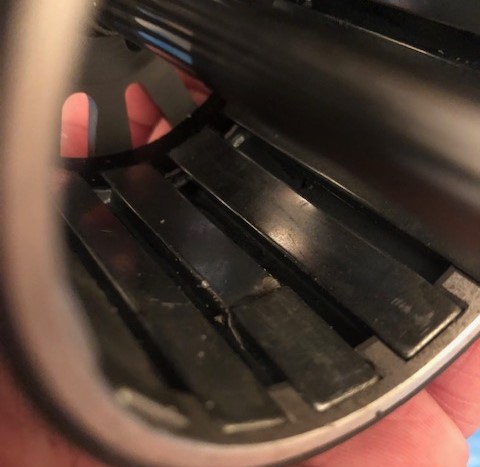
So I was looking for a way to make my motors more reliable and came accross the “battel hareden” thing.
But what is battle harden?
Battle harden means to fill all gaps in the motor with epoxy. A really well made motor should already come like this (some maytech motors and the new torqueboard motors for example have epoxy filled gaps in the motor bell)
This way the magnets are more strong fixed and should withstand even an impact.
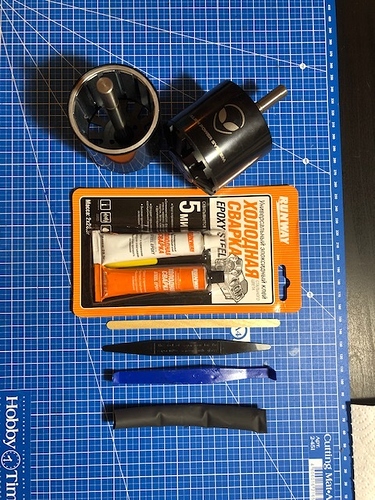
What do you need?
- Epoxy (maybe also some thickener for your epoxy)
- some wooden sticks
- heat shrink big enough to cover the motor shaft
- cups for mixing
- lots of papers
- gloves if you want
How it works?
If you too lazy to read through, watch this video:
In the description you will also find some product information.
As I sourced all my stuff locally I´ll not link anything.
The epoxy I use is a 4min epoxy used for motor and car stuff.
For me it has the perfect consistence. It´s fluent but still thick enough to don´t run away from the holes.
First you need to take appart the bell from the stator.
Than you want to remove the shaft.
As this might be not comfortable for most of us, you can just cover the shaft with heat schrink in the right size.
You really don´t want to get some epoxy on the motor shaft.
If you work on an old motor it makes sense to clean first the bell and make sure everything is dry before you continue to apply the epoxy.
Depending on how fast your epoxy is getting dry and how fluent it is, you will need to mix up more or less epoxy.
For me it worked best doing 3 lines than clean up everything, wait 3-4 min and continue with the next 3 lines.
If you mixed up the epoxy you fill the space between the magnets with it. Probably your magnets will be covered with some epoxy too. Use the wooden sticks to clean the magnets as good as possible.
Repeat this till all your magnets glued in and it looks like this or better 
It´s recommended to let the bells sit like this as min one day.
During this time I had a look at the stator too.
Here you could do the same with all windings.
It could probably help if you have a slightly lose winding or strange high pitch noice coming out of the motor at a specific speed.
I for my own deceided that it´s not really necessary.
One thing I didn’t like on the motors, that the phase wires are pressed to the housing. In this place the windings also soldered to the flex awg cable. I have seen pictures of broken/cut isolation exactly in this place, that´s why I decided to cover this place with epoxy too and restrict the cable moving to like zero.
If you plan to do this as well, take care that the phase wires are in the right angle coming out of the motor. If they stay up too much it´s not possible to mount your motor later 
One more thing you could do in the same time, cover the sensors and pcb with some lack or epoxy too.
waterproofing your hall sensors can save you from a lot of troubles.
Ok, so it´s time to put everything together again.
Turn the bell with your hand and make sure nothing is rubbing.
if it is, some 500 sandpaper can help to get rid of this.
I also recommend to do a new motor detection after you assembled everything back, to make sure everything works how it should.
Happy riding!
