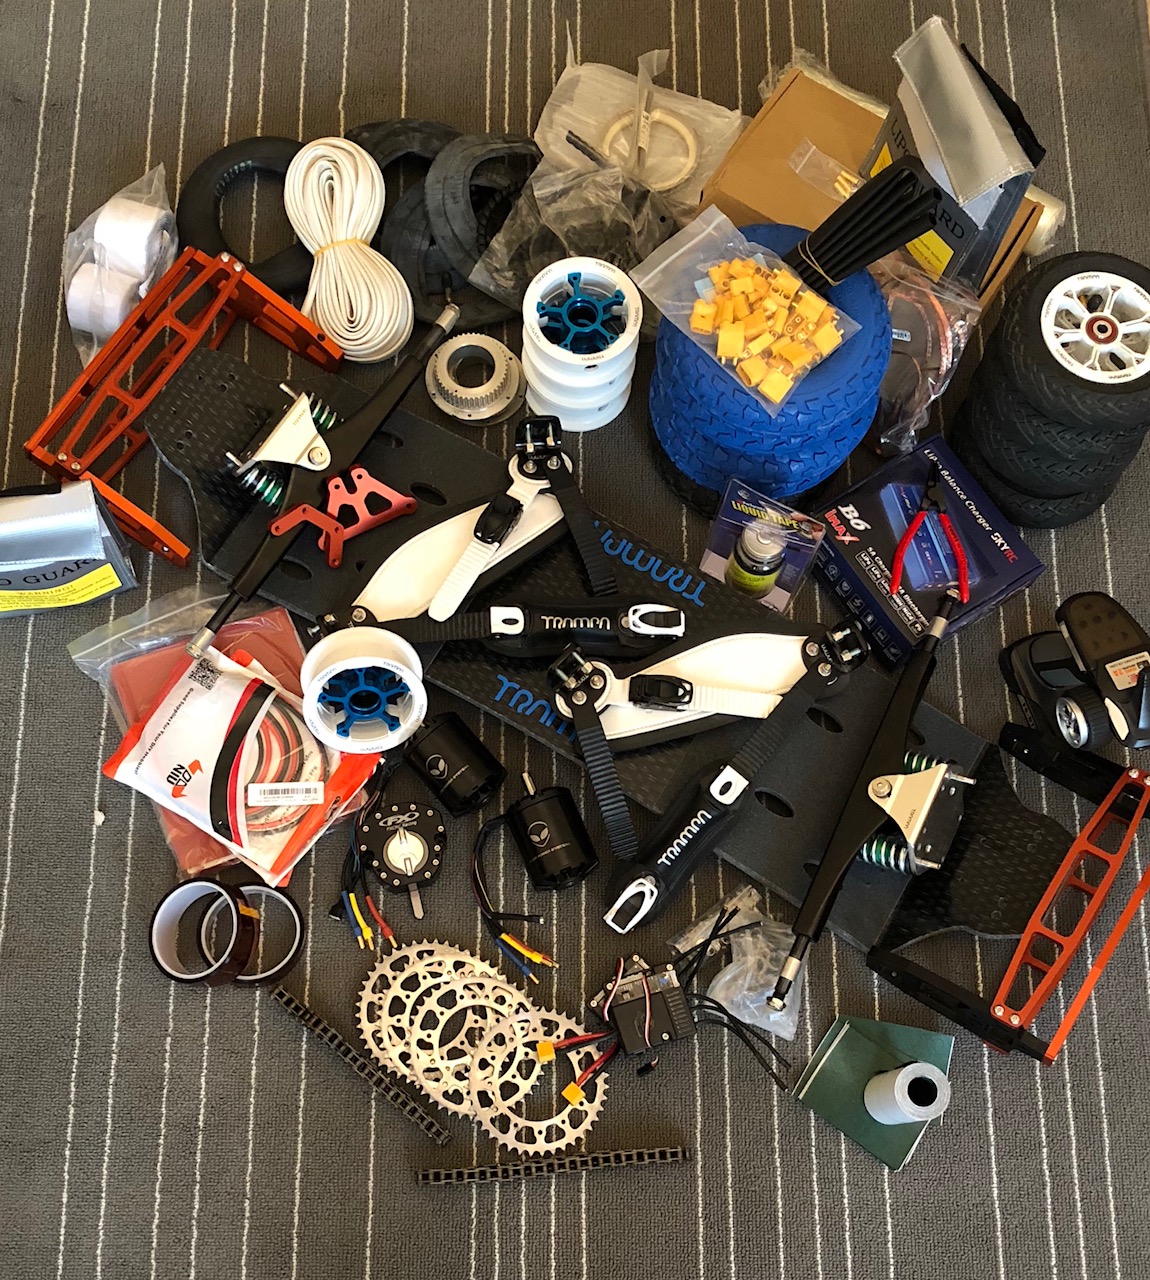
Last year around this time I started to play around with the idea to build a chain drive quad. Not because I really need it, just because… I can and for the giggles…
The build process was a long way and the light white
was born during building this quad out of spare parts and parts which just didn´t work for me on the quad.
So let´s get into the build process.
As usual in DIY if you wait for parts they take ages to deliver.
The APS motors which have been on backorder, took 3,5moth to get to me instead of the 6weeks which was stated on the website.
As well as the ESCapes haven´t been ready, so I decided to start with the part I had till the rest came in.
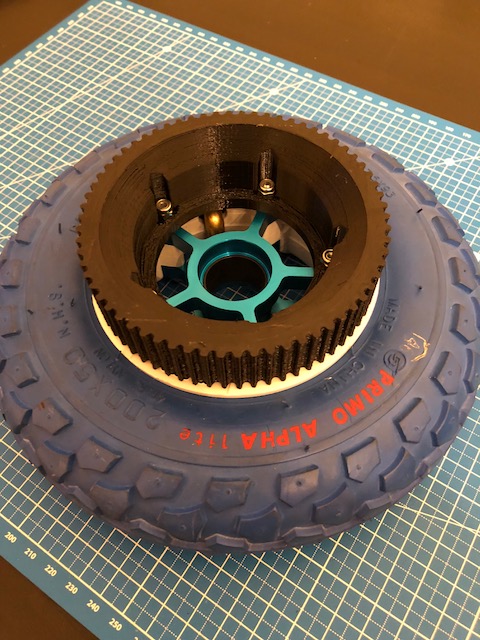
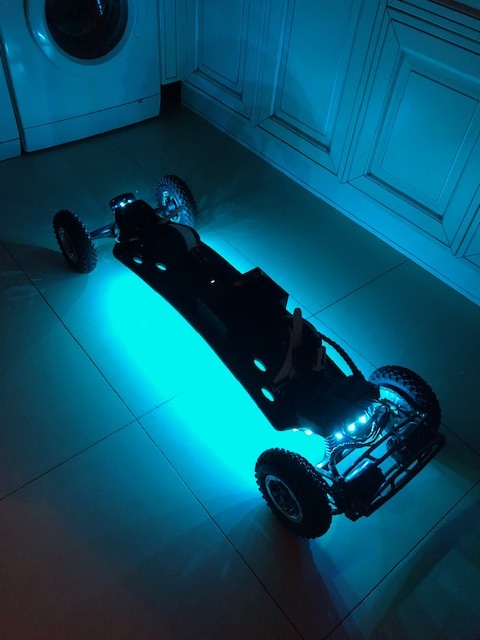
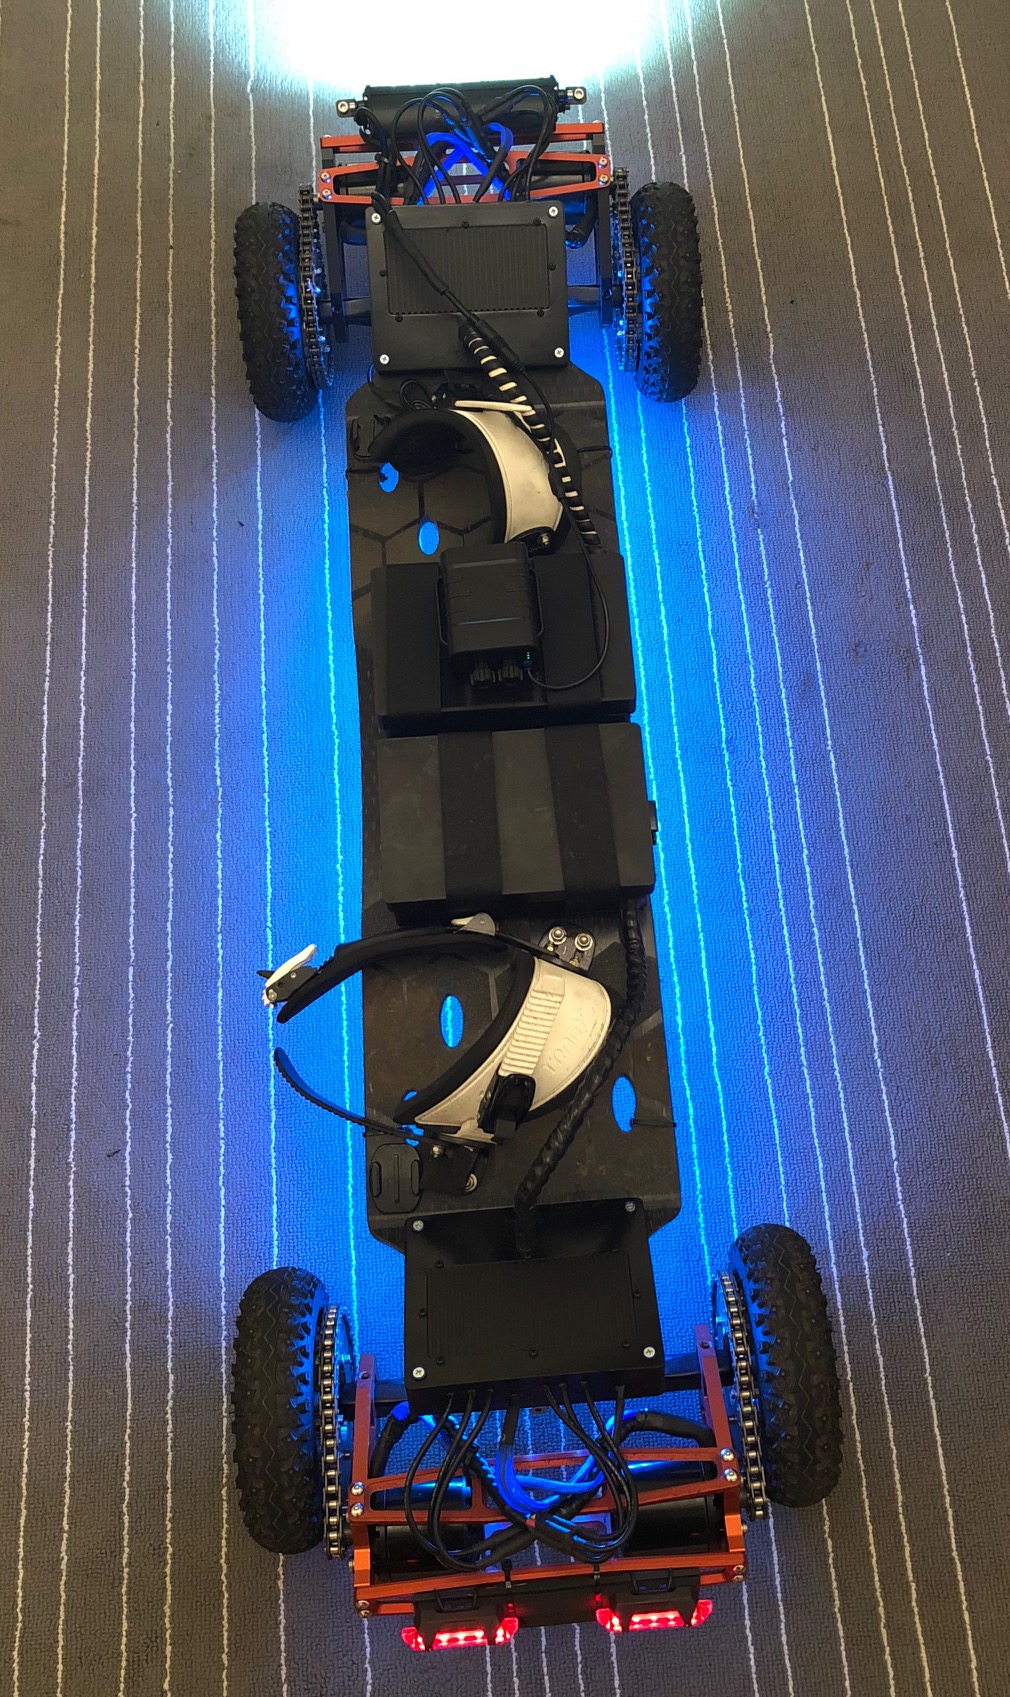
The board already was set up with dual 6384 170kV APS motors
Things I had to do next
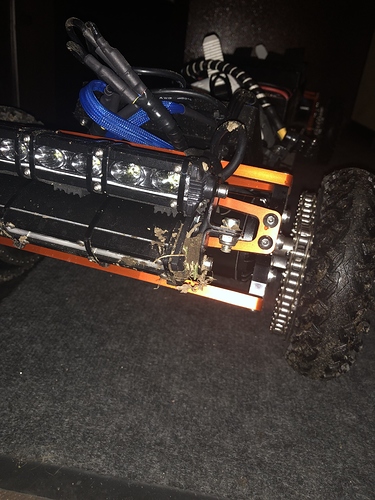
• install the steering damper (front or back truck)
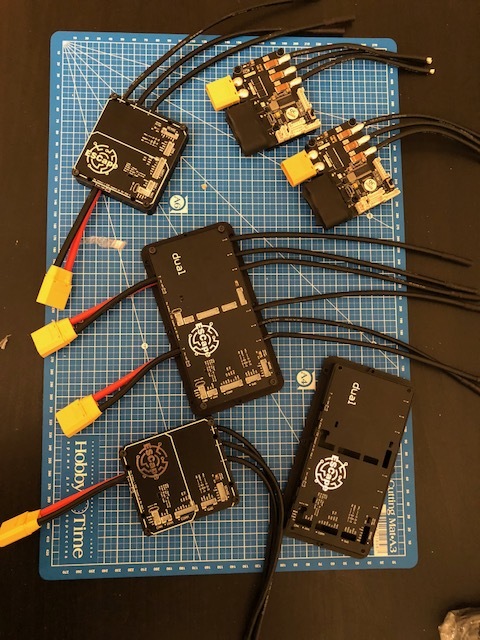
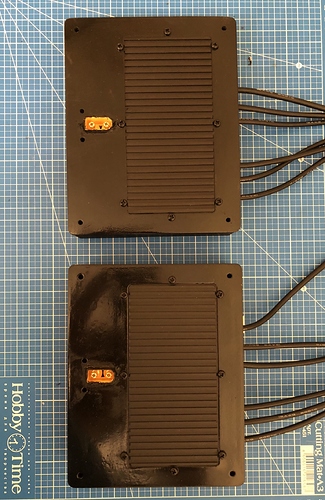
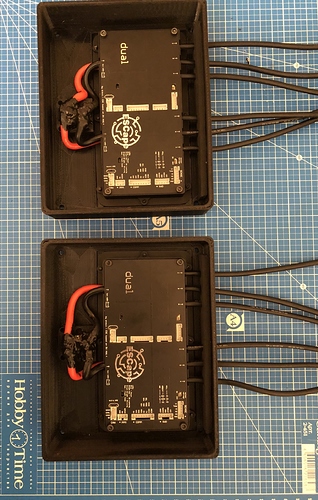
• design and 3D print a dual focbox case
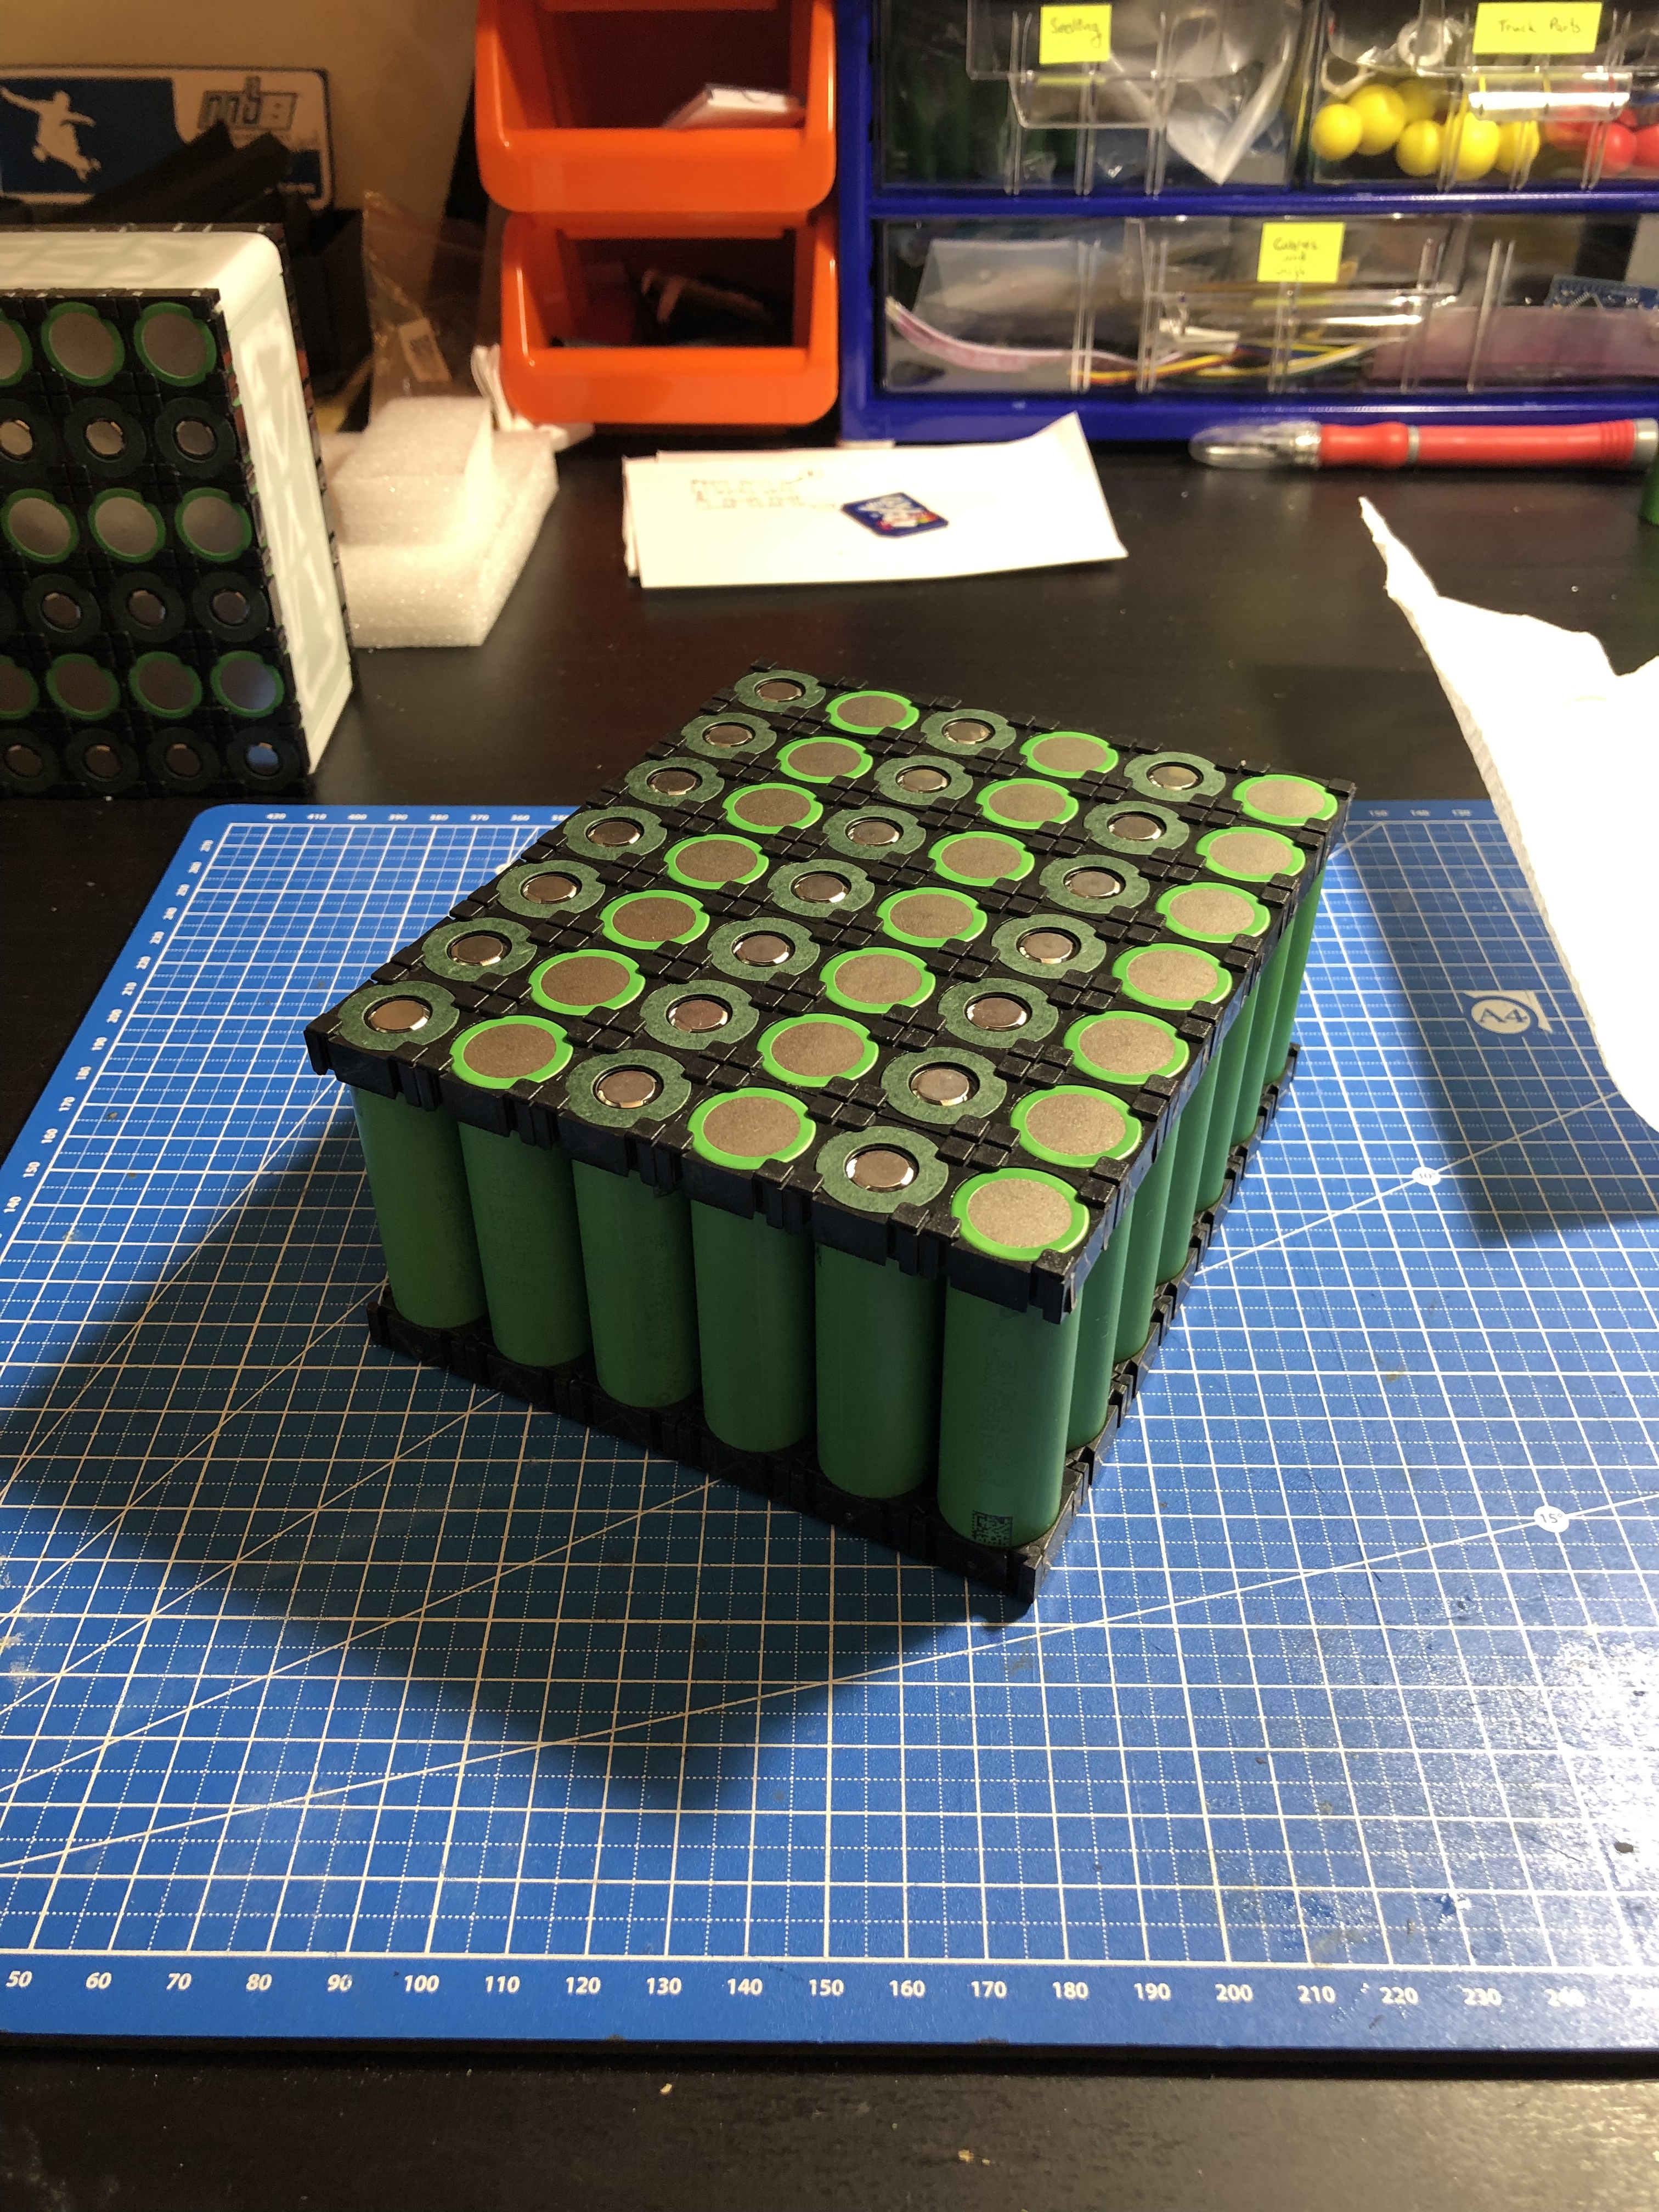
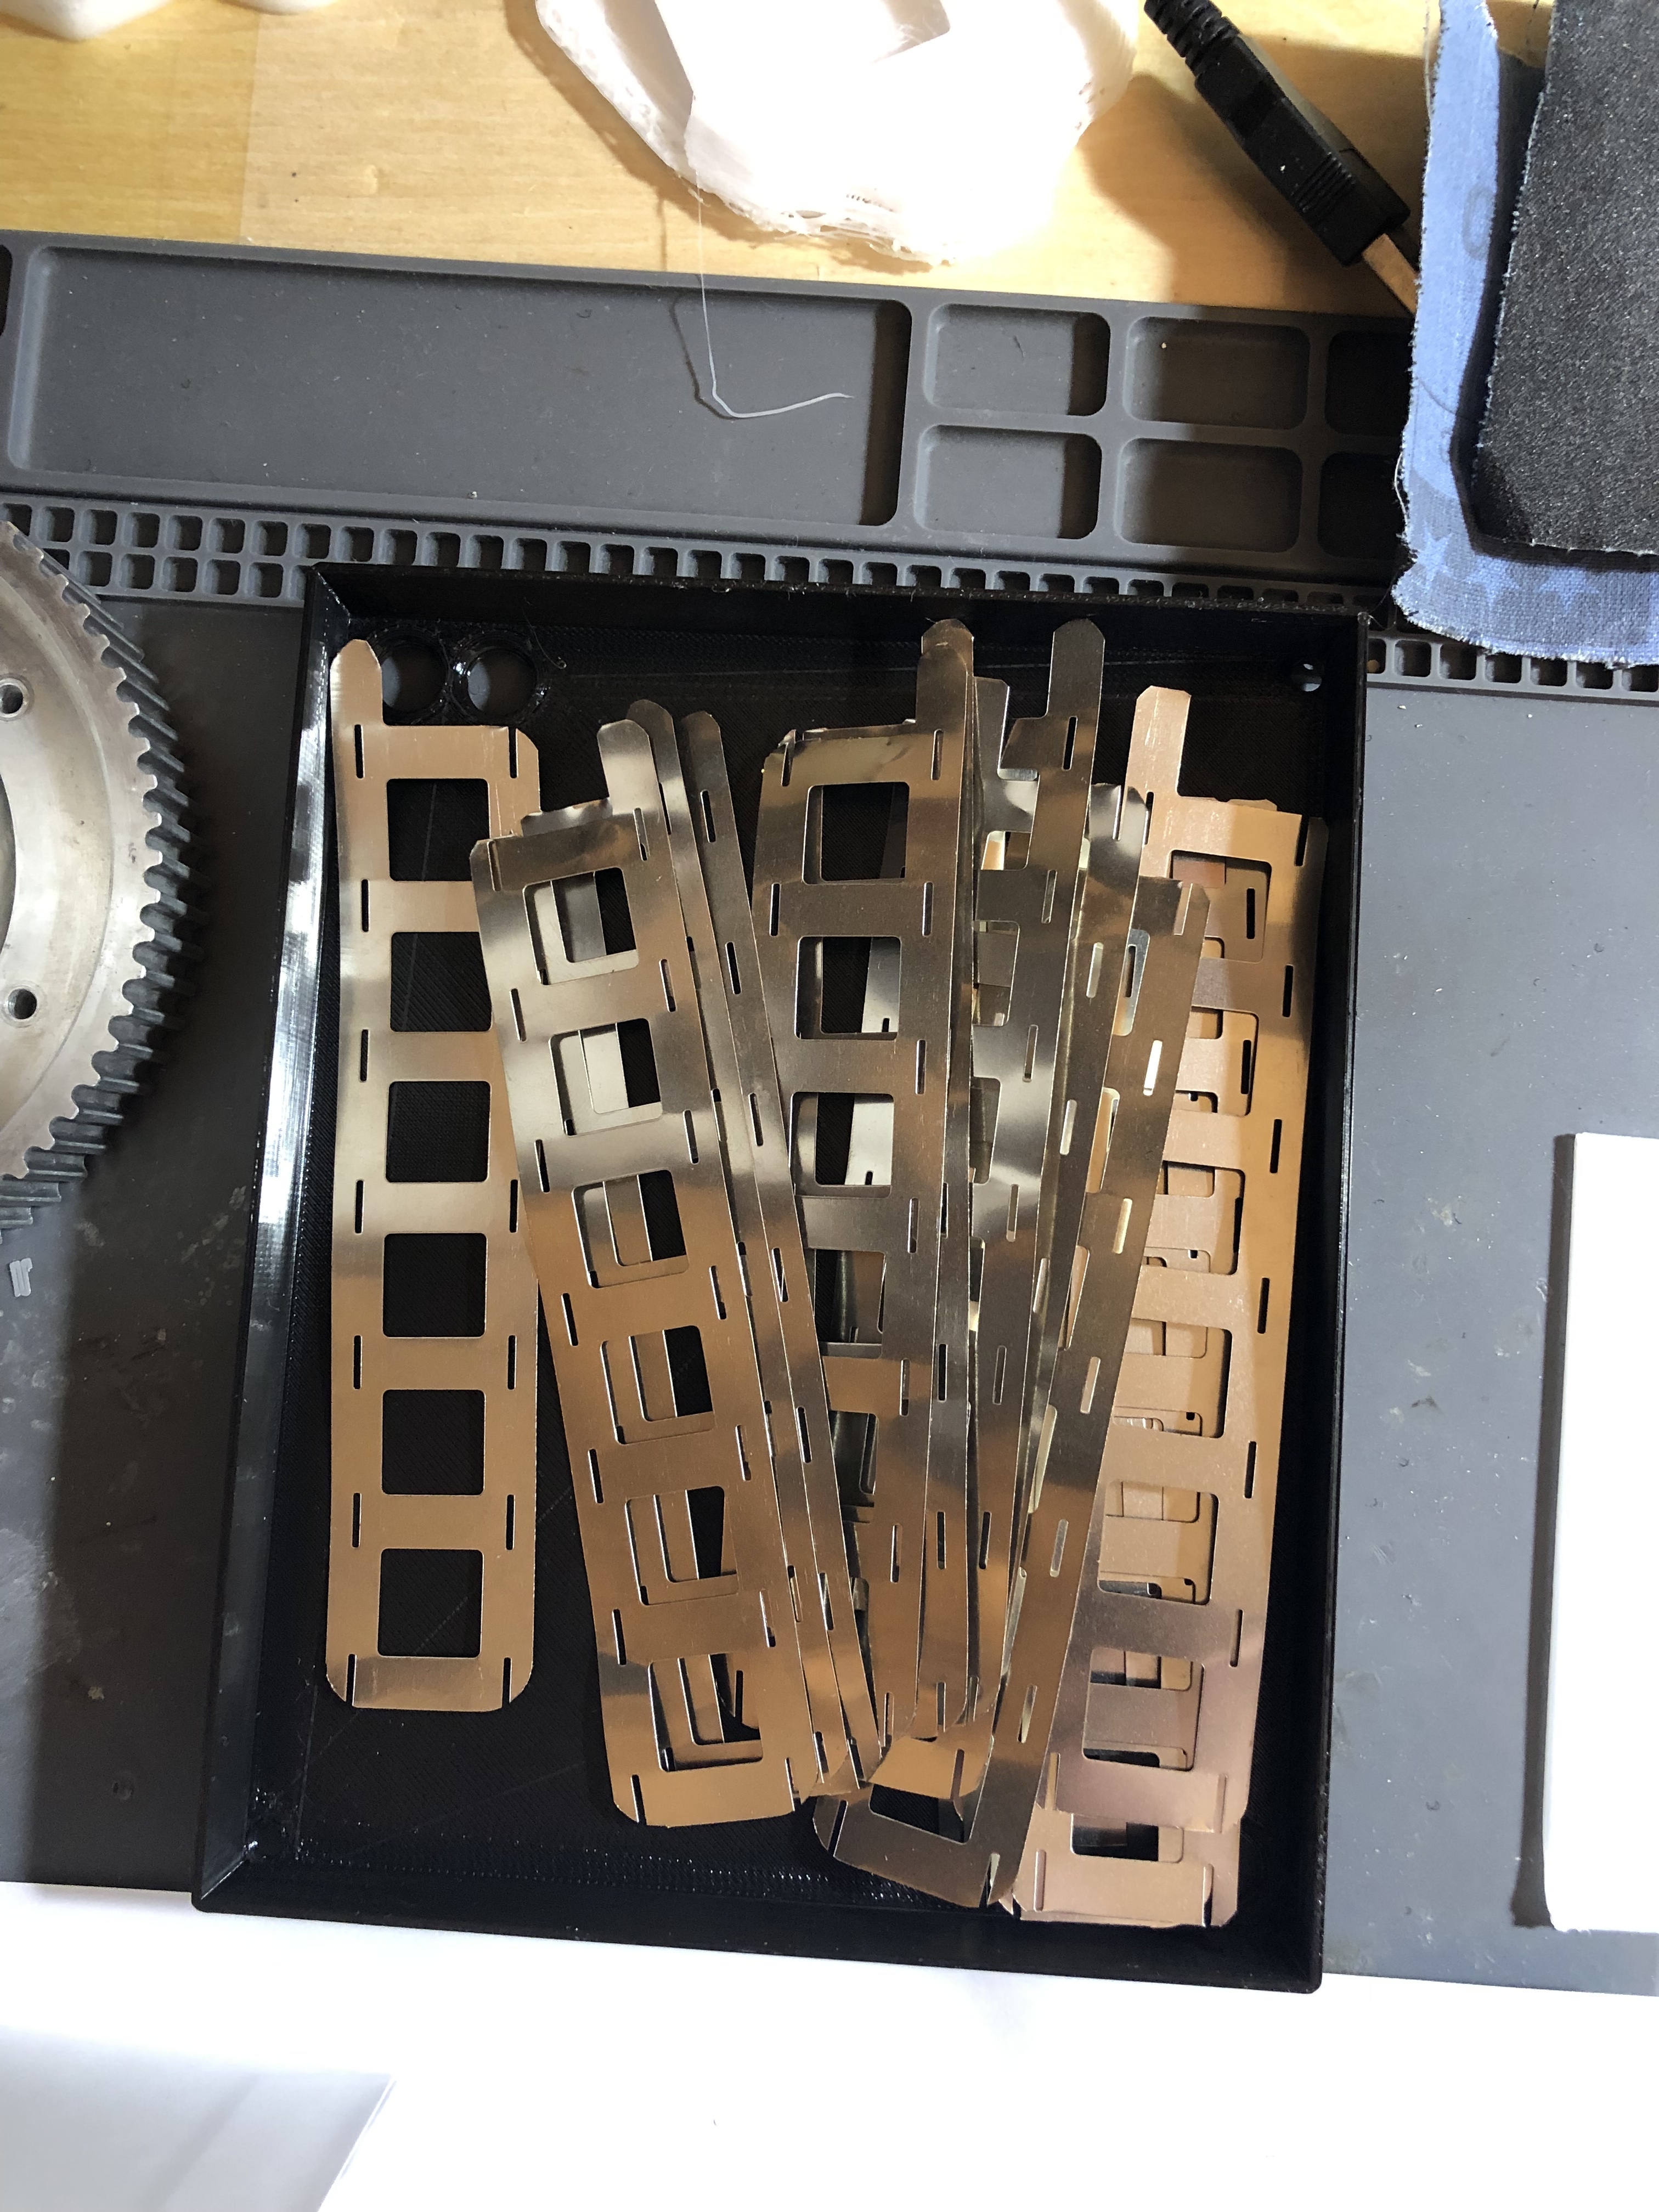
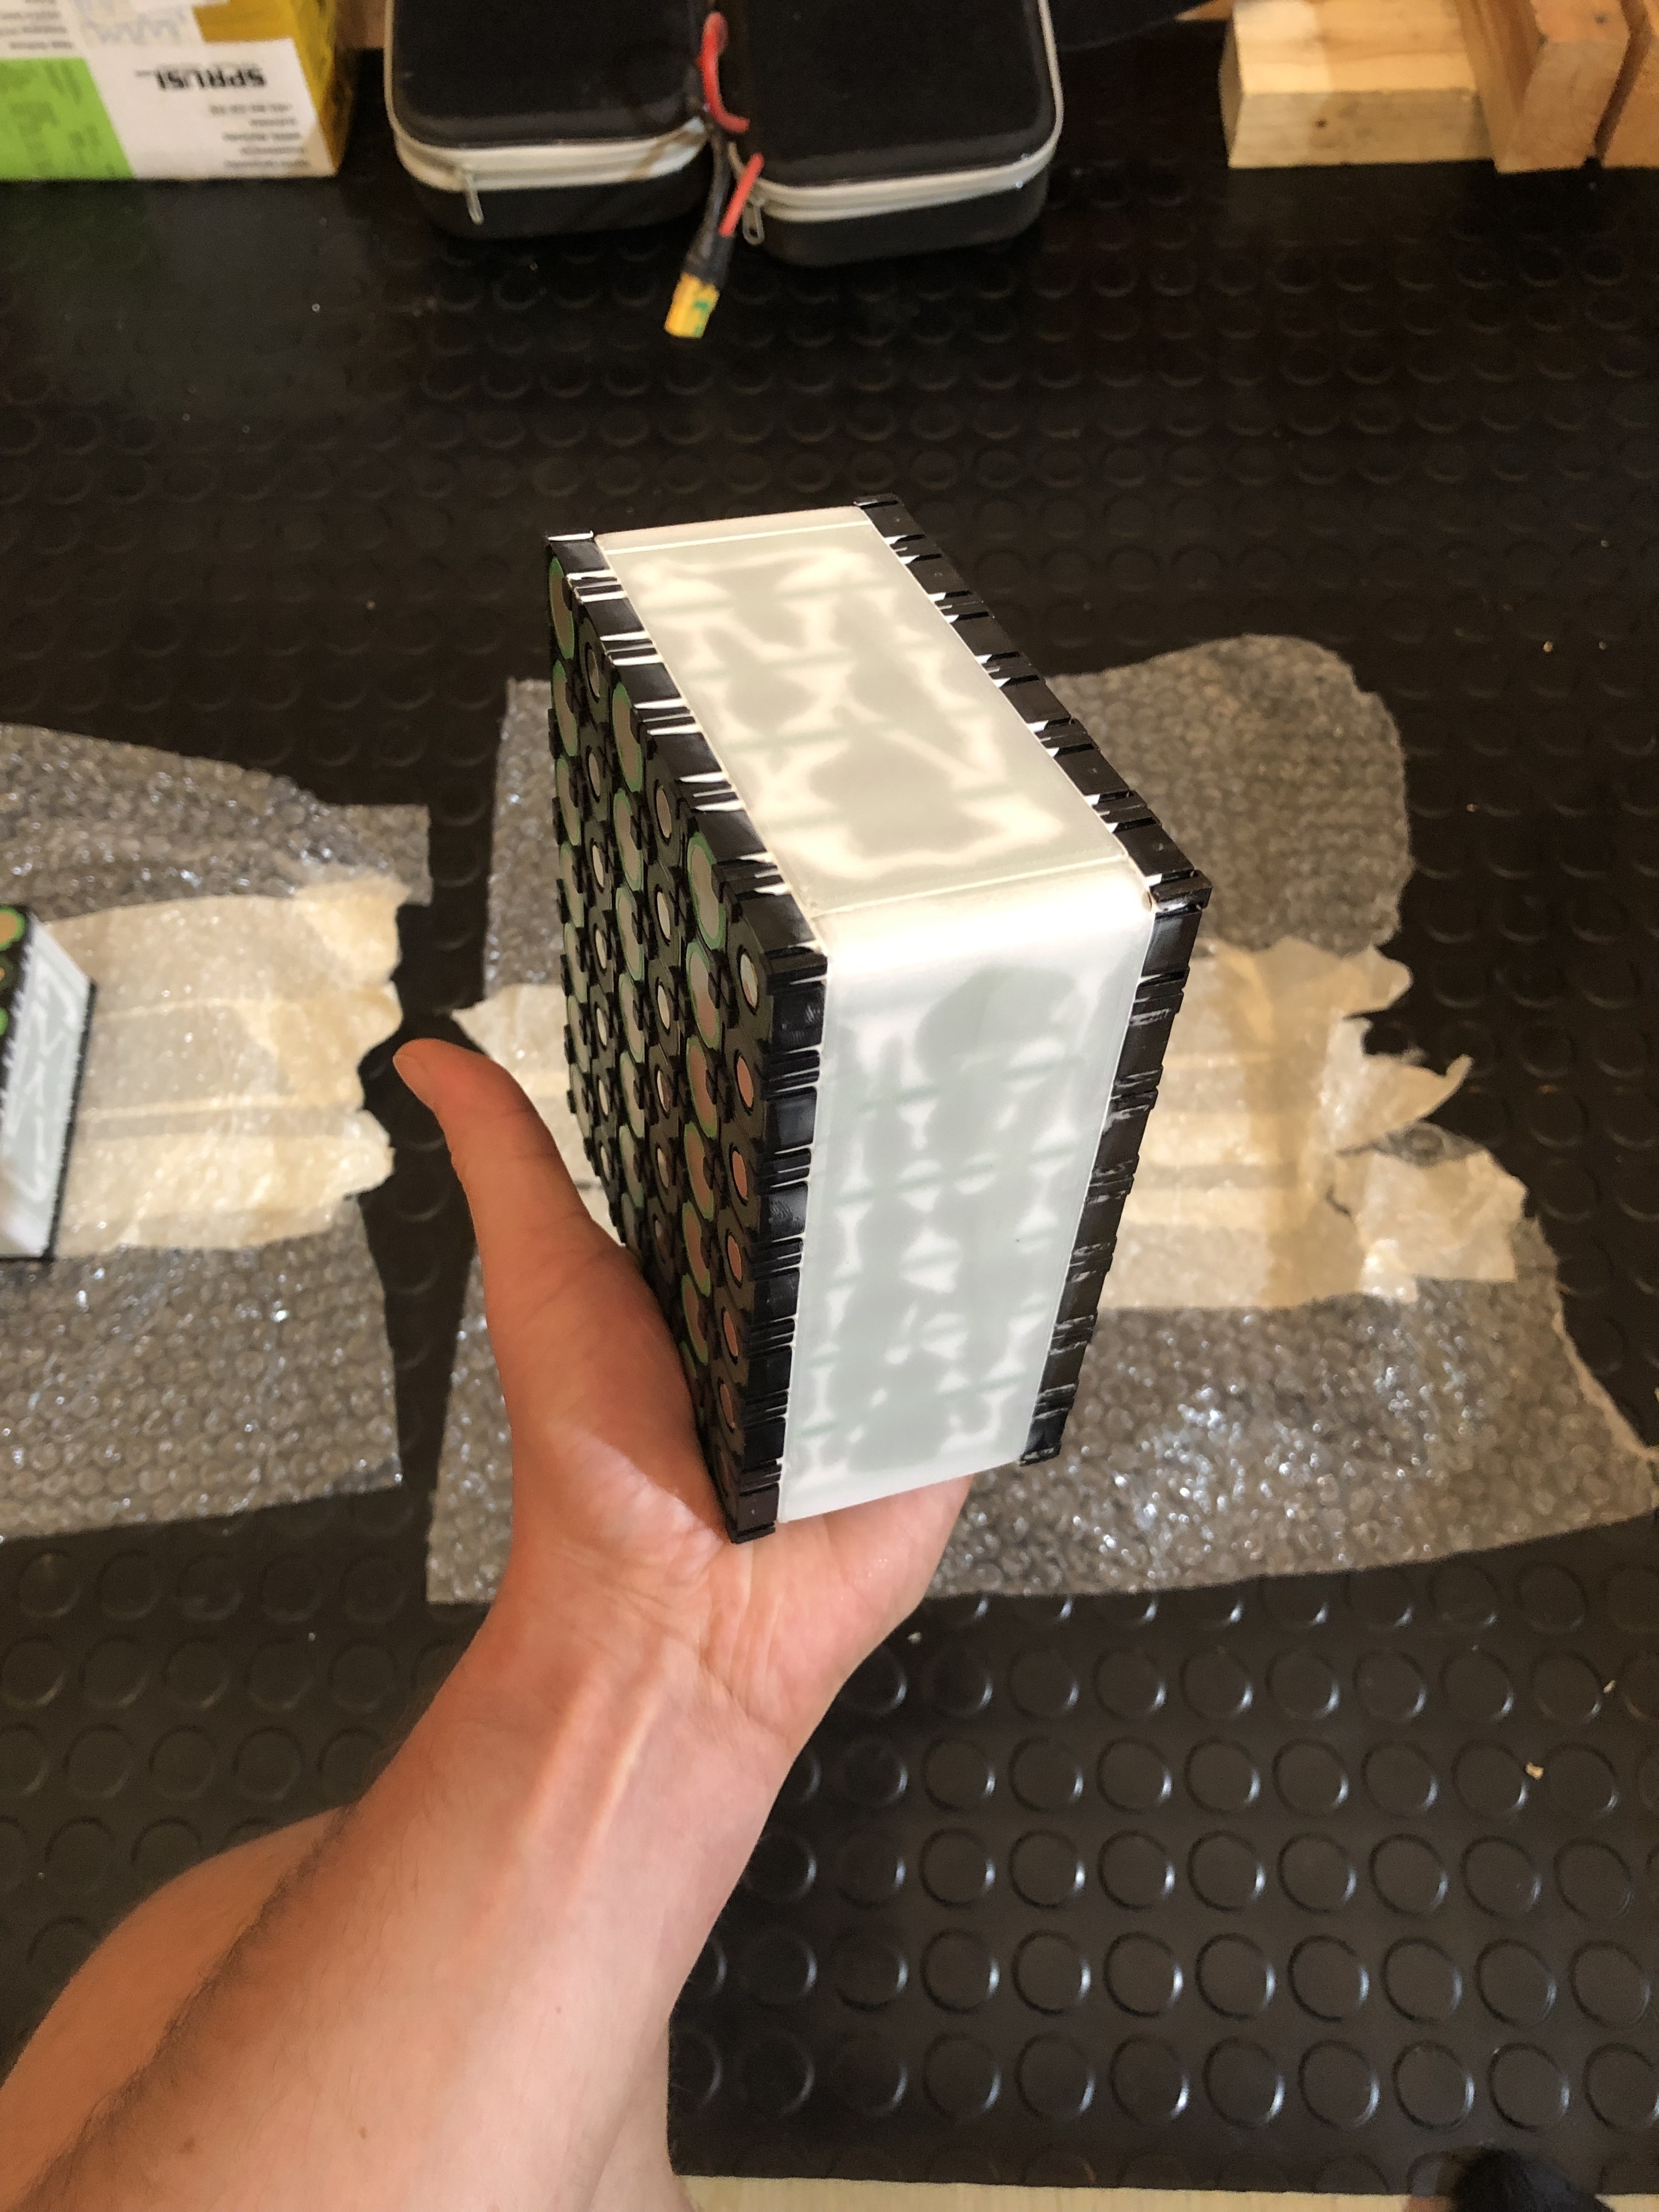
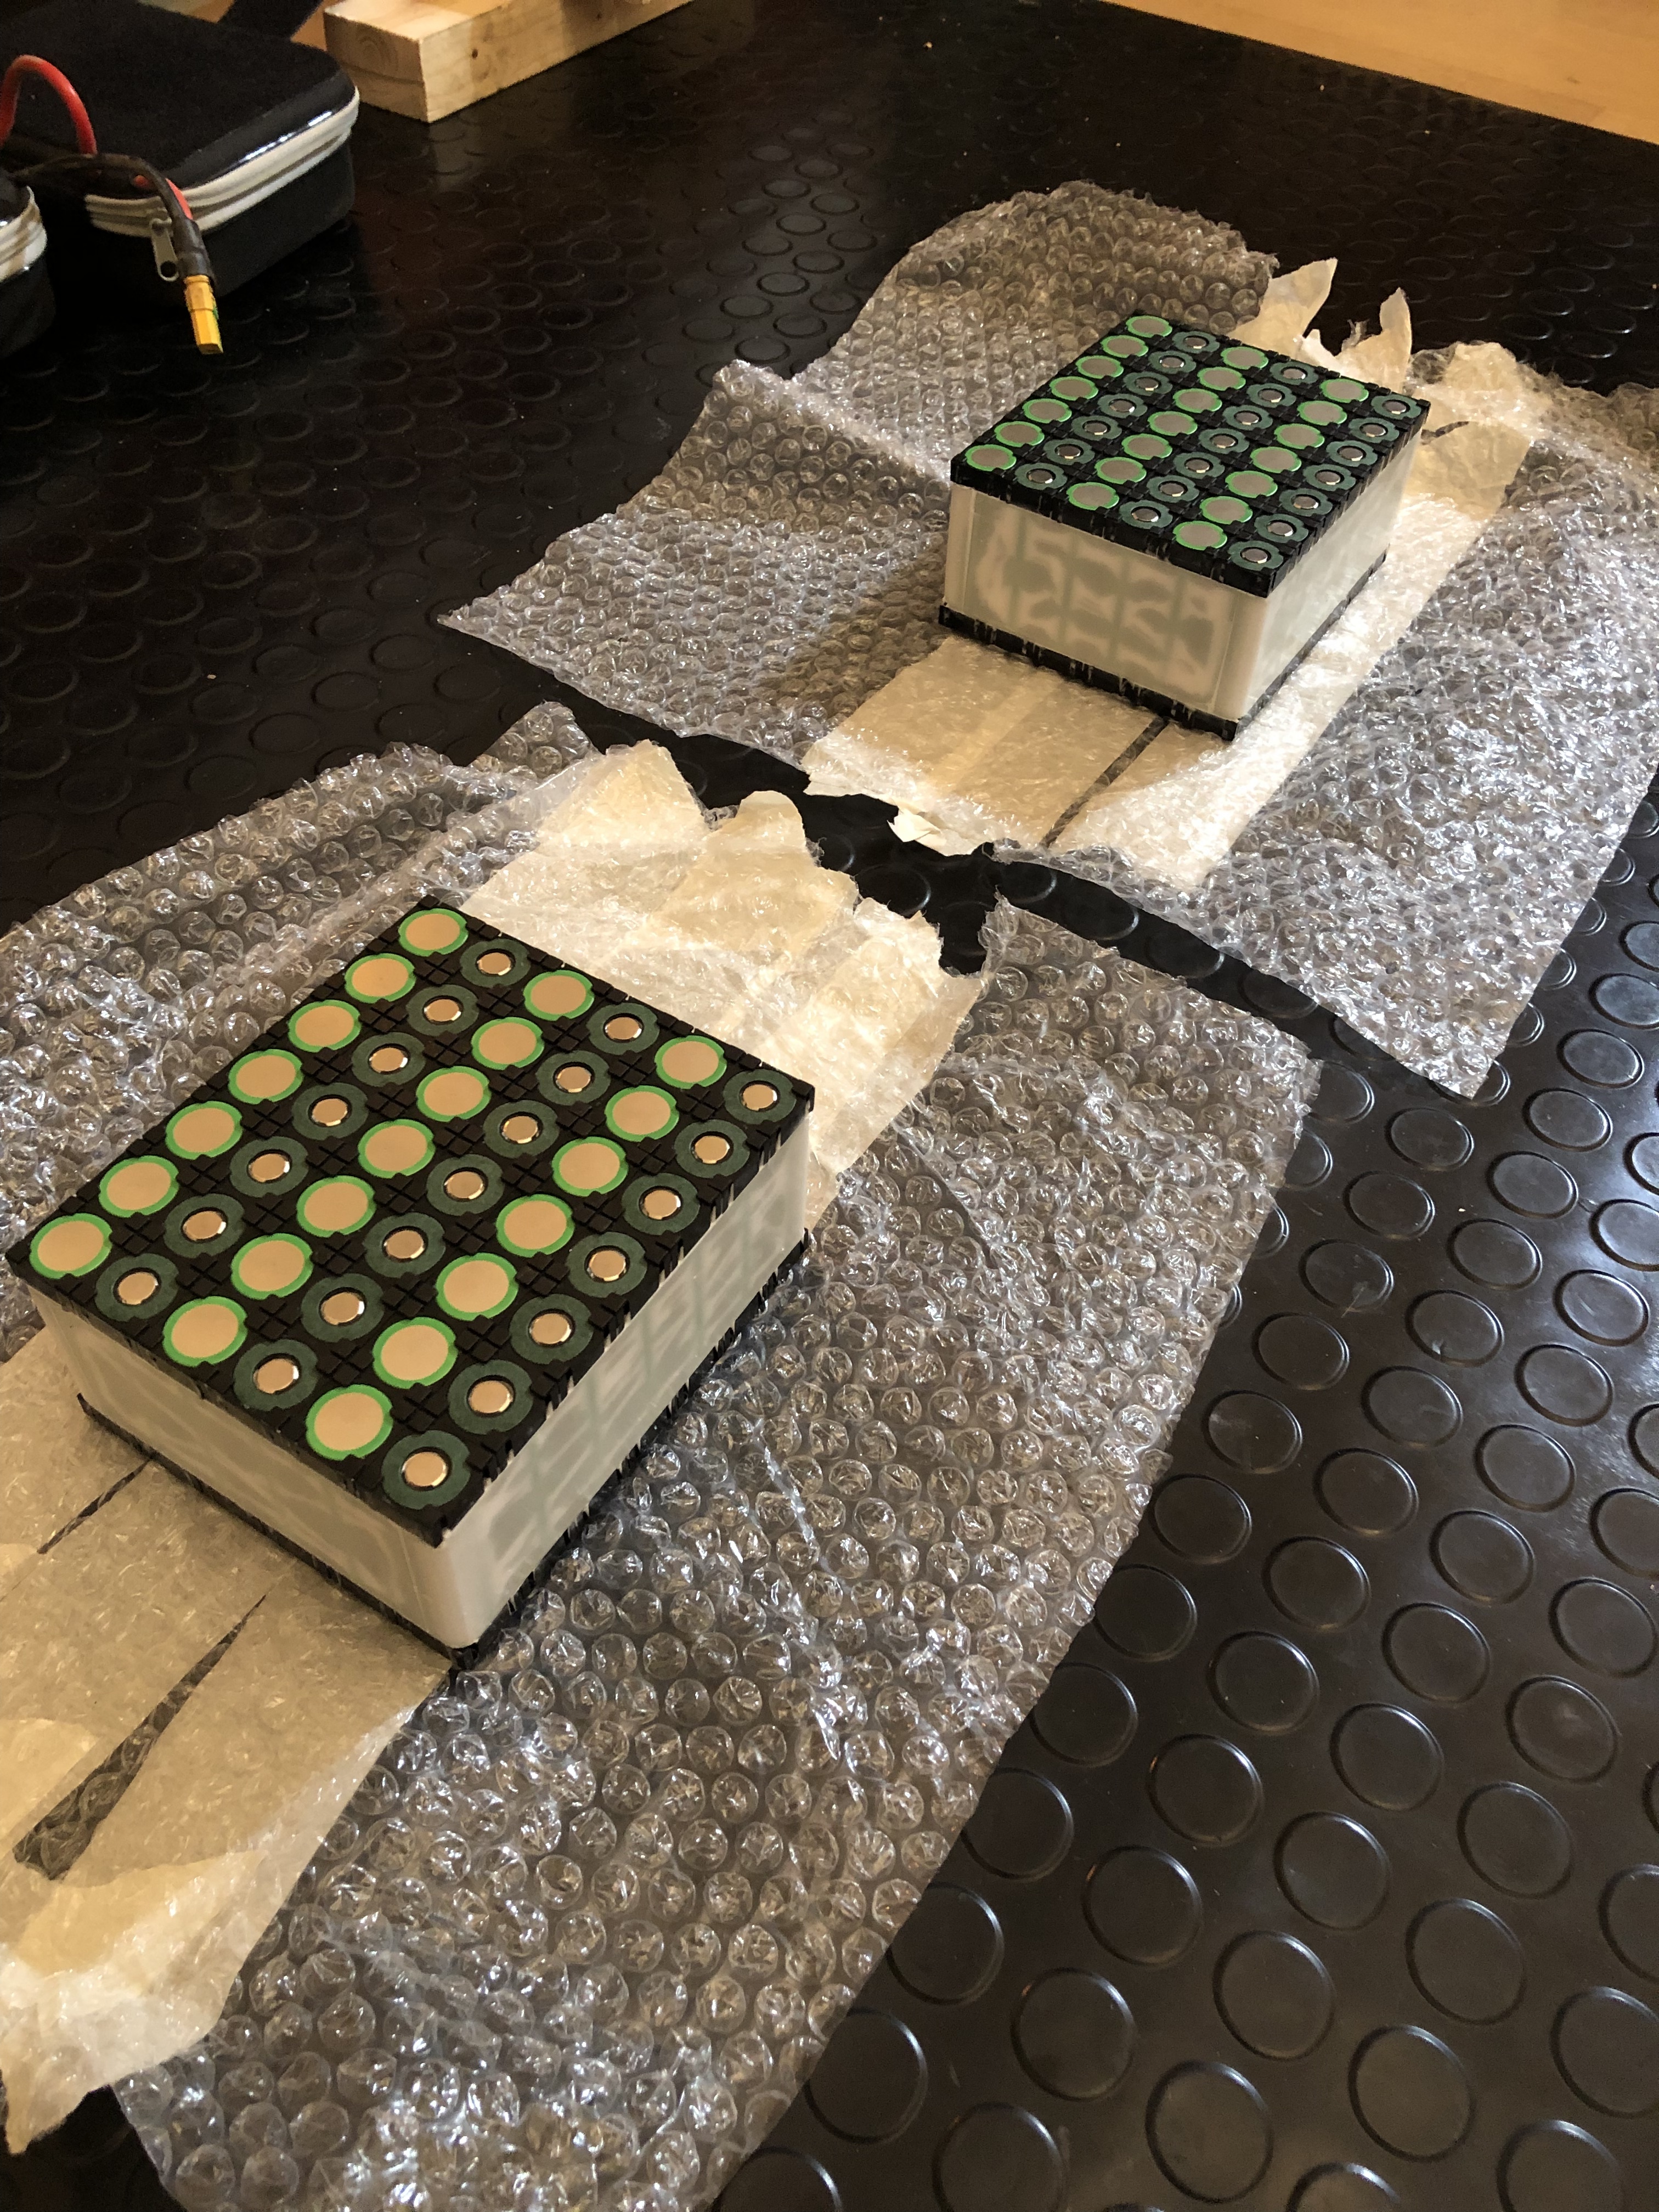
• design and 3D print a battery box for the 5ah heavy duty Lipos
• solder split plugs
• solder wires to the Bluetooth modules
• solder all cables with plugs
• solder adapter for motor sensor wires (or maybe I just cut them and directly solder a 2mm HST plug to them)
• 3D print some GT2B mod cases and install the electrics
and waiting the Lipos arriving from the custom clearance…
I figured out that the deck I received was the wrong ply.
So I started with 15ply deck for now.
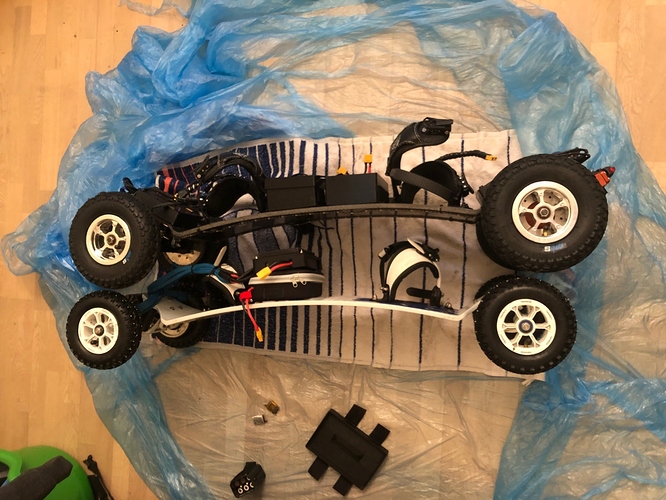
Things I done first
• 3D printed dual Focbox case is done.
• 3D printed battery box is done
• got some new griotape, as I really didn’t like the trampa stock griptape on the holypro.
• installed the steering damper on the front axel
• changed the bullet connectors on the focbox to 5.5mm guess now I lost my guaranty
• jst 2mm extension for the aps motor sensor wires done
• Bluetooth module done
• 8AWG power cables from battery to the vescs done
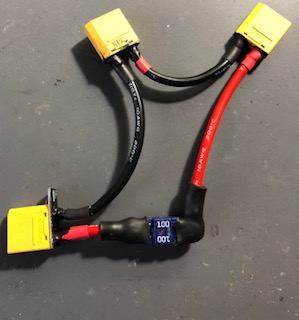
• fuse serial plug for the battery box done
I was quite surprised that soldering 8AWG to the xt90 was so easy. read a lot of people here had some issues.
I used a small thin gauged an twisted it around the end, than added some solder to the wire and to the plug, heated up everything and put it together.
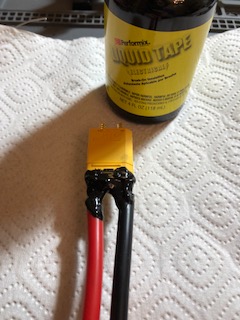
My new friend is liquid tape…just used it for all open metallic parts I found.
Maybe it looks not so accurate, but the result is what matters!
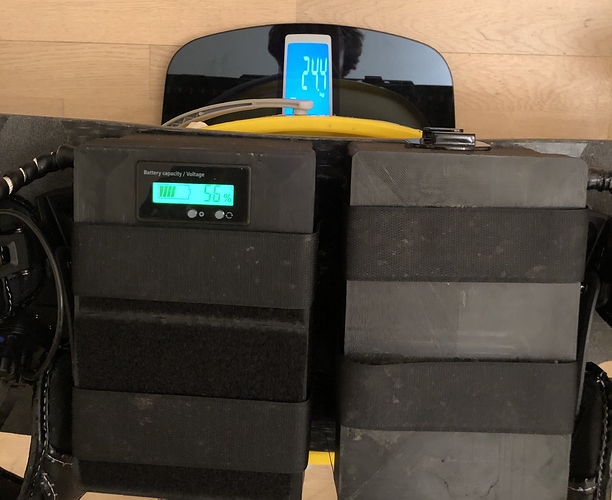
My battery box is equipped with a xt90 serial plug in which I integrated a 58V 100A fuse. Hope I choose the right size. If not I can change it to 80A or 125a which I have as spare too.
When I finally had the time to set up the focboxes
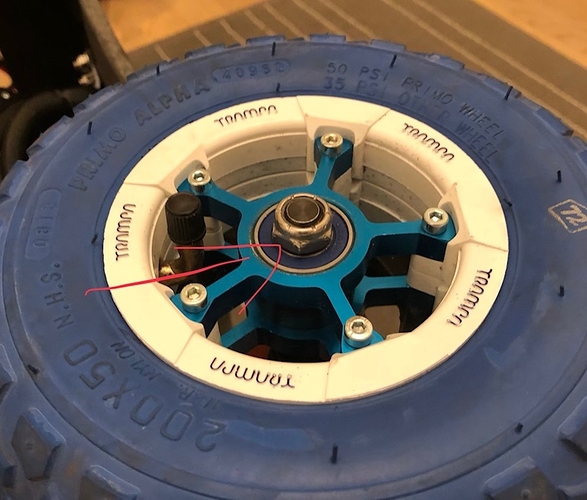
Everything went well till the motor detection…
than this happened
Don´t know what it caused to fail, but thankfully the APS customer service is pretty good and promised to send me a new bell. Only down site, again waiting…
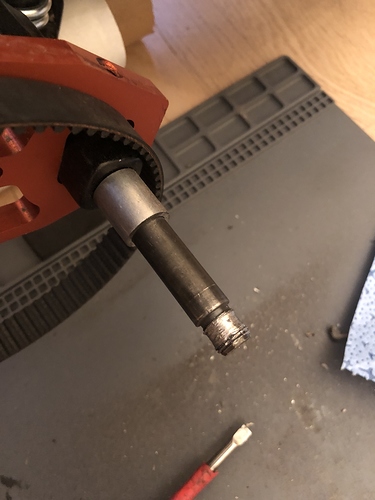
As one of my APS 6384 motors broke while motor detection I needed to find an alternative to come back on the road…
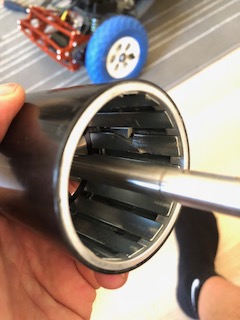
Luckily my old sealed 6374 motors from eskating.eu survived the fire and only the wires where burned.
So I decided to open them up, clean them and set the wires up again.
The problem with it, they have a 8mm shaft, the APS motors 10mm and so does all the new motor sprockets unfortunately too.
I have two 15mm 15th motor pulleys, but here the next problem appears…all the belts I have are too short…
So I ordered a set of new belts.
As I didn´t want to wait till the belts come from china, I thought why not to use the opportunity to 3D print my own 66th pulley which should fit than to the longest felt I have at home…
And as result I got this:
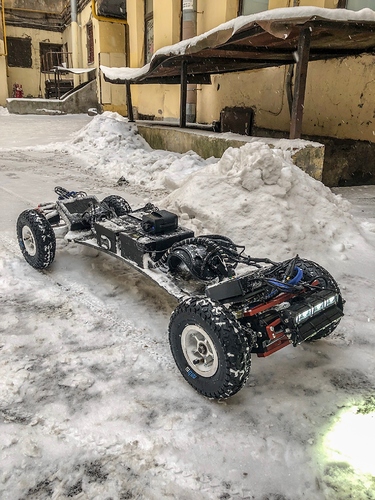
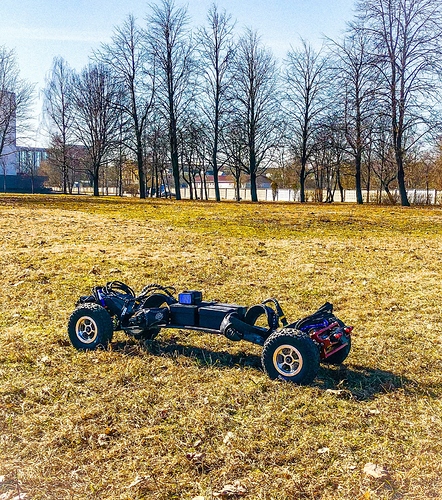
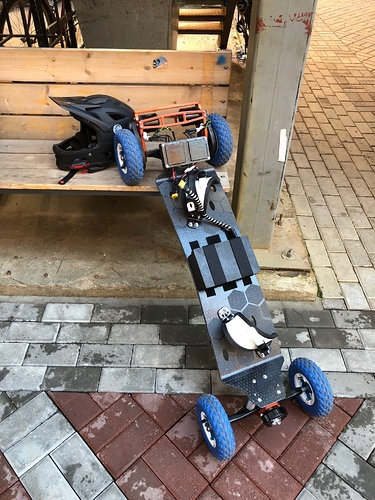
First lucky sunny weekend and could finally take the board for a ride.
that´s how it looks in wild life…
I´m a bit disapointed about the steering damper.
Was hoping to get a bit a bigger range of variation from tight to lose.
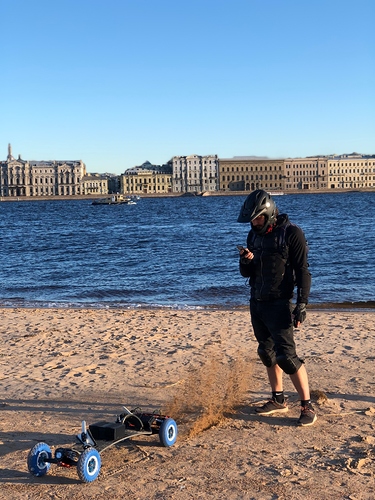
Riding my board here in Russia is always a bit a kind a strange.
Don´t wanna know in how much videos I have been again on the weekend…
It´s not common here. There millions of E-Scooter on the road, but a e-MTB is hard to catch.
Unfortunatly I run in the next problem.
I can´t get off the nut which hold the wheel on the hanger.
It´s just turning but not moving…looks like the thread is fu…ed…
let´s hope it´s just from the nut not from the hanger
So good to have a dremel at home. Just can recommend everybody to have one at home.
You never know when you gonna need it…
I orderd a new infinity hanger and one more set of superstar rims.
chrome/black to hold it a bit more decent.
When the hanger arrived I realized that they come without plastic inserts and nuts …totally overseen that… unfortunatelly I also couldn´t find the right size of nuts in any of the hardware shops close to my home.
So no way around to order and wait another 1,5 week for the missing parts…
meanwhile the APS motors arrived after 2,5 month backorder waiting and 3 weeks UPS document trouble war…
the problem with it, the damn order wasn´t complete… I ordered 4 motors but they sent only 2…
I opened the motors and sealed the sensors like usual.
I could fix the one 6384 motor with the replacement bell which they sent me.
Till the coating got dry I used my old set up to have some first jumps in the park
But than it was time to change to dual 6384 170kV and chains
I very much like the setup and the sound of the chains.
The torque is nicer with 170kV instead of 190kV.
Definitly noticable. But I also lose about 2km range out of my 5ah Lipo packs, which probably comes with the more agressive riding and the chains them self too.
In the last week weather became better and I startet to adjust my motor and bat max values.
I increased slowly the values till I reached now 50a bat max 80a motor max on each foxbox.
The temp of the focboxes max out at 55degrees and the motors at 65degrees. The max bat current I reached till now was 35a for each focbox.
I still wait for the two missing motors to arrive.
So for now now quad drive. Probably also not in the next weeks as I like the “light” setup and enjoy to practice more jumping.
I´m looking now to get some more Lipos to get more range.
I have two sets of 5ah lipos which last each about 30min, than I need to swap them.
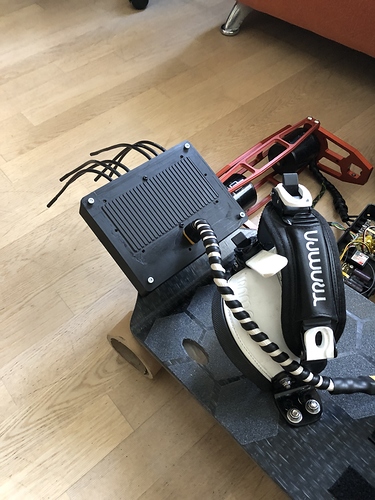
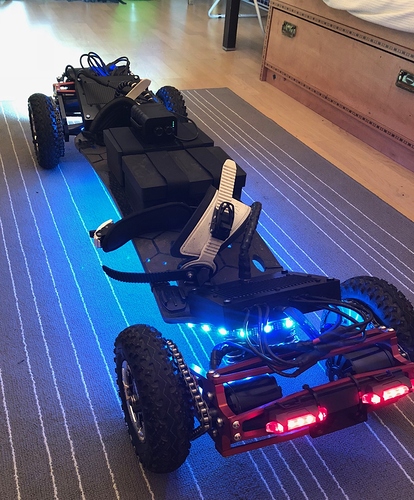
I also added some lights under the board
I´m sure they will not last long as I hit a lot of stones and wood, but it becomes very fast dark already and my front light´s still not arrived.
Let´s see, for now it works and I like the look…
I finally came back to cut some videos (before I cut mainly vacation videos…)
I hope I can improve my riding and video cutting skills in future and I hope you guys will like them too.
Here one last short ride in my park close to home
and even if it´s not the best video ever… i put some random night shots together.
The 2 missing 6374 motors arrived and I finally had time to put things together.
I removed the steering damper as I was not happy how it performed.
Don´t know, maybe i´m making something wrong, but the steering damper is more lose than yellow dampas only and I can´t really adjust anything. May be it came broke from the beginning. However i don´t want to spend another 70-80€ to try that out. as min not for now.
The dual ESCapes are connected via CAN and each side has it´s own GT2B receiver I paired to one remote.
Both sides independent from each other.
Means I have a 12S1P Lipo pack for my front ESCapes
and a 12S1P Lipo pack for my back ESCapes.
My initial ESC settings are
Motor max 70A
Motor min -50A
Battery max 50A
Battery min -15A
Unfortunately I couldn´t take it out for a test ride, but I hope during the week or latest on the weekend I´ll get an opportunity for it.
I´m interested how it feels compaired to the dual drive and how much range i´ll get with it.
First test ride done!
As expacted the range is not double up with double battery and 4motors.
With dual motors and 12s 5Ah range was 8-10km max.
With Quad and 2x 12s 5Ah packs I get about 12km (maybe a bit more in the summer)
I made a short video from the first quad ride
I also had my first crash…
There was a piece of cut try sticking out of the ground, which I haven’t seen because of fallen leafs… hit it with the front motor mount… made a big front flip out of my bindings and the board was pushed up too and landed like planed directly on me just good that I always packed in some layers of safty clothes
And guys (and girls for sure too) never EVER forget wearing a helmet.
Even if it´s just for the 100m ride to the next shop!!!
The mounts didn’t took any damage and even the light is still ok. Seems I hit the tree only on the corner.
I checked all screws and connections back home and realized the crash made even one screw flew out and one more to become lose.
That wasn’t the case before the ride.
I now locked really all screws with loctide too.
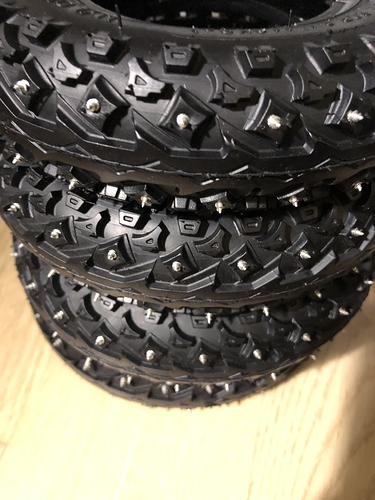
Meanwhile I also made a set of studded wheels.
Not sure so if they will last long, but if they will, I will make a short how to in here
I didn’t have had a time to install them yet.
Last weekend it finally started to snow and the snow seems to last.
Sure I made a short video of my first ride in the snow.
Things I realized:
Without heel straps it’s definitely not possible to drive safe. The place where the foots staying get full of ice and snow so fast and that’s really slippery.
So what i have to do in the next days:
Get on the studded wheels
Install the heel straps
And up the motor and battery values.
Aaand down with the motor min settings.
Breaking with quad is kind a tricky with -50a each motor. If you push the trigger to stop it stops…and this stop happens in the same moment had some critical moments when I was riding first time
I thought i´ll not need a battery meter, but I change so often my set up and also the weather change so often, that I totally can´t “feel” how long the batteries will last and i´m a bit tired to take my phone always out to double check the battery voltage. So i decided to make a quick fix and add one in the cover of the battery box.
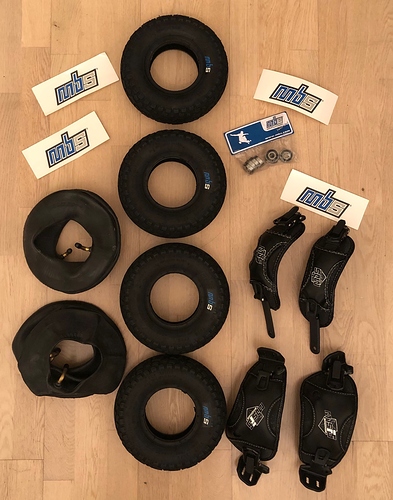
This week also my @MBS order from black friday finally arrived.
I ordered some 9" wheels and bindings for my quad. The 9.5x28mm bearings are going on my other build.
I really like the feeling of the bindings.
Super soft but non the less super stable (as min the first dry impression )
I´m very happy that I made the decision to try my luck with 9" wheels.
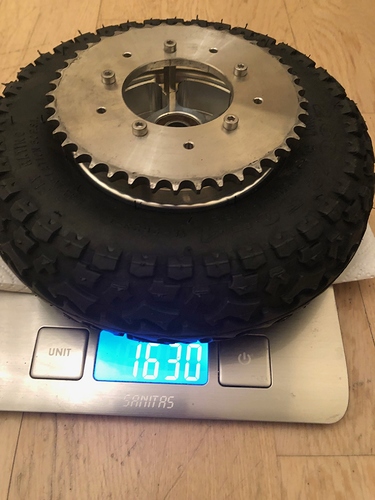
As I wanted to keep the sprokets and stuff for my superstar hubs, it was the best way to go with the hubs from 3DServicas.
They fit the 9" wheels and have the same bolt pattern like the superstar hubs.
The total weight of one wheel with sprocket jumped from about 1kg to close to 1.6kg.
Usually I would mind about the extra kilos, but the build is already too heavy for any jump sessions etc. , so the extra weight doesn´t matter so much.
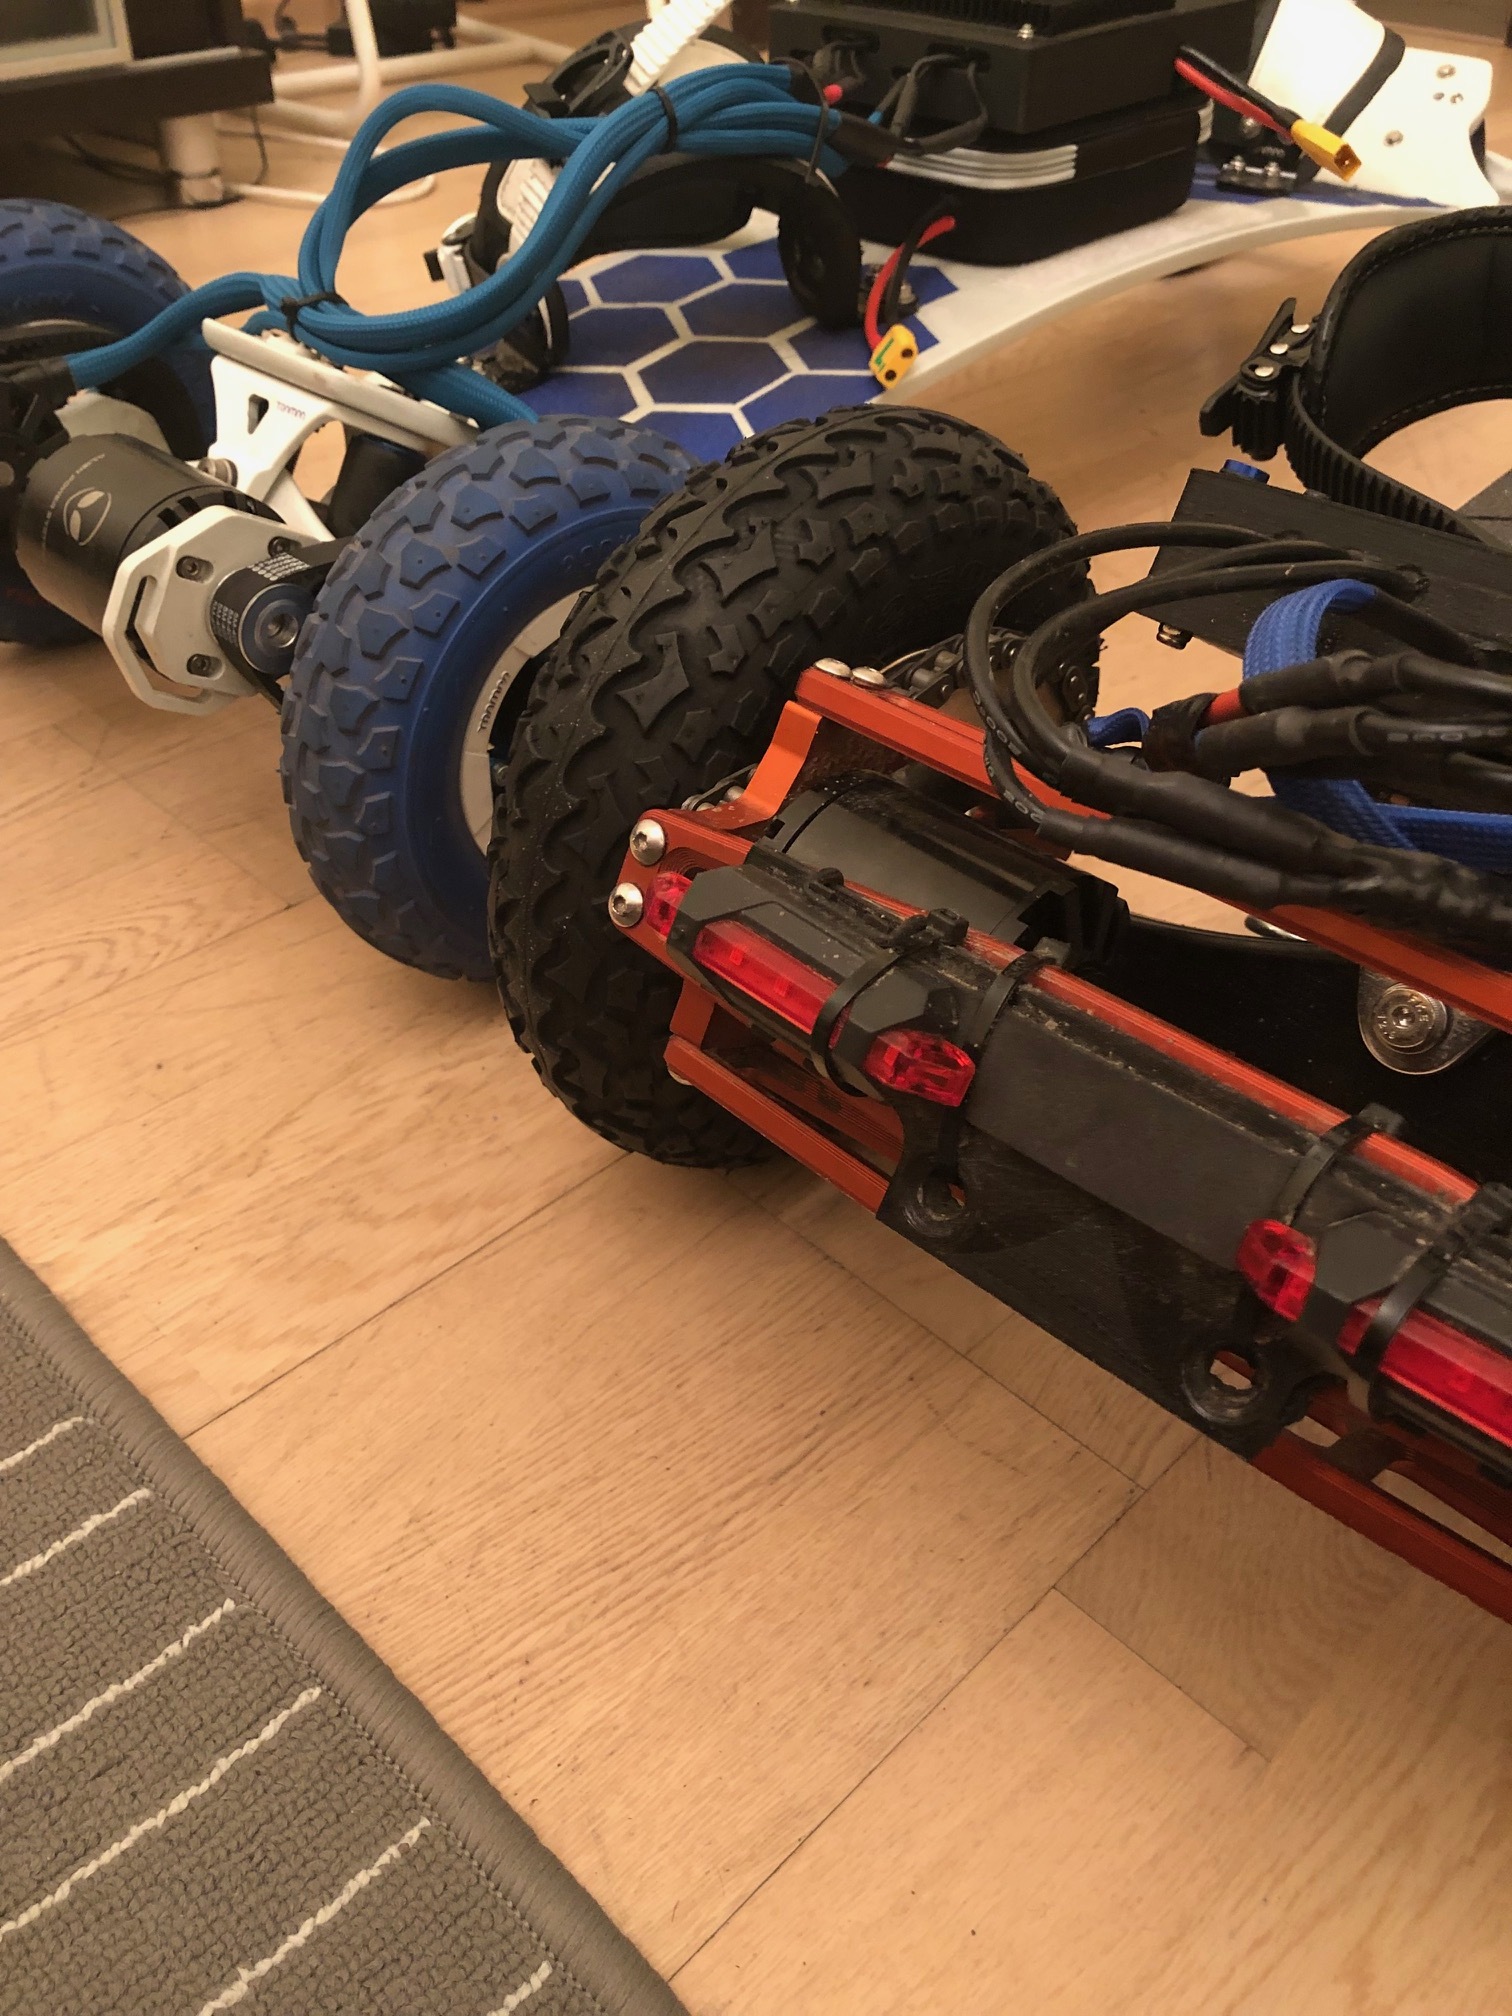
Here some more pictures to get a bit a feeling of the size difference between 8" and 9" wheels.
I like the clearance now. The 9" was the last missing part to get a real 4WD ready (still thing 10" would be even better, but makes things too complicated. As min for this winter )
Now I only need weekend to give it a try… can´t wait for it!
With the final setup I was interested what is the overall weight including Lipos
I forgot to add the batteries for my front light, so I would say 25kg is it in for now.
I also can now say that the MBS F5 bindings are very much my choice from now on. They way more comfortable to compare them with the ones from Trampa as well as they sit perfect locked on the foot. Just some different colors would be nice…maybe one day MBS will do that.
First impression of the MBS 9" wheels…
they definitly rock da house…
super good grip even on snow. didn´t expact that.
As usual not everything went well on by ride.
I got suck once in deep snow and was wondering why.
Realised that the XT90s on the back ESCape box became lose a bit and the VESCs throttled down the power output.
The problem caused the very tight cable length and that I fixed the cable on the bindings. I´ll probably just add a adapter xt90 which will give me like 5cm more length and everything should work than in future without issues.
Unforunatelly that was not the only fault…
Short after that I noticed some kind so scratch noice comming out of the front. Very quickly I realised that something with one of the motors went wrong, so I tried t come home as fast as possible.
At home one motor already didn´t moved at all anymore, so I took the motor appart and found one borke magnet there…
As this was the last opportunity for me to drive this year I decided to take the second board and continue driving…
Eveything was fine for the first 15km… after that the same thing happened…
so in total I broke two magnet on two motors and both of my boards…
That´s not how i expacted the year to end.
I can´t explain the broken magnets as they didn´t got hot etc.
but I now definitly know that it happend while i had bad contact with the road and the wheels where spinning up on a high rpm.
If somebody can explain me what could cause the broken magnets I would be very happy.
That´s already the 3rd bell from this motors with this issue.
I still worry a bit that this can happen one day when I drive on top speed… motor locks up and I, with bindings, locked to a 25kg board
So what´s my plans now…
I´ll get two replacement bells for the broken two.
That will happen only in January, so till middle of February my quad is definitly out of work
I already started to battle harden the motors which still working.
That means I fill the empty space between the magnets and the bell with epoxy.
I hope that will give them more strengh and it was the last broken magent on this motors.
Honestly I would like to swap the motors to maytech or similar after that experience,
but to swap out 6 motors is not really a cheap thing and than you also don´t know if it will maybe happen with the new once too.
Here one picture how I get my boards dry after a snow ride
And even if i hadn´t too much driving time, I tried to make some small videos
Wow great to read the whole story all together. Now all the waiting on aps motors makes more sense haha. Great build man! I wonder if the magnets like to crack more with the heat differential. Motor runs hot, snow/air is cold… Going from cold to hot while offroading.
2 of my next 3 planned upgrades are because of you! I need those 9" tires and f5 bindings so I can tackle anything.
we will see next winter. now all motors well prepaired. If they still fail in winter than the cold conditions probably are the reason.
For now they run smooth and nice. Did the same for my 8085 motors as well.
Can’t say. Our beach is pretty far from city and not really soft sand. I wouldn’t expect much in soft sand. The wheels will get stuck fast. I guess you would need min double as wide wheels as I have now.
ok thank you. I will referend a bit about that if it could be an option instead of belts. Im generally a hub guy, but always eyeballing with your chain drive builds. they are so awesome and the sound is so scary hahahaha
 guess now I lost my guaranty


 …totally overseen that… unfortunatelly I also couldn´t find the right size of nuts in any of the hardware shops close to my home.
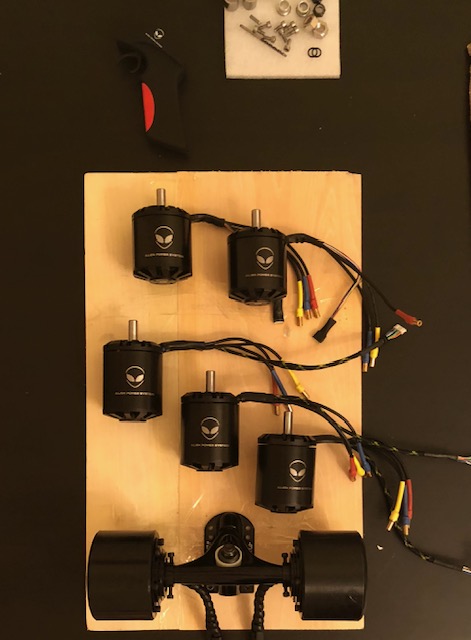


 had some critical moments when I was riding first time
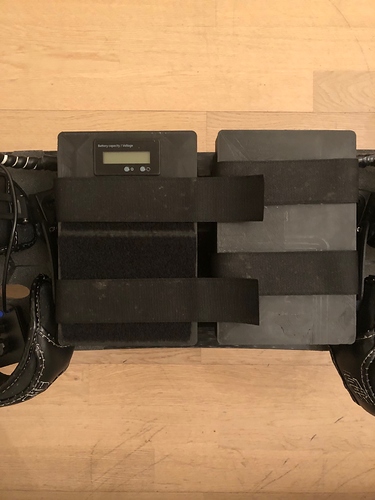

 )
)