The Last Mile / 55cm (21.7") Pennyboard / 10S2P / Dual Hubs / Custom Firefly

Let me just start this off by saying I hate walking.

As my main commuter board is heavy as a bag of bricks and pretty much requires me to wear heavy safety gear (because I can’t resist the urge to sometimes max out the throttle on my board (55km/h)), I decided that I want/need something that I can easily grab with me and not worry about having to park it somewhere and bring/wear a truckload of safety gear.
My solution: A pennyboard that I’ll Frankenstein together and limit to MAX 25km/h.

Parts list:

  • Old pair of abused 90mm eBay hubs + trucks that I bought a ages ago for my first build. All I know is that they are 550W each and can take 10S. 120€
  • 22" (55cm) crappy 7ply Pennyboard eBay deck 22€
  • Clear griptape 10€
  • Dual FSESC4.20 Plus 160€ + 50€ Shipping & Tax (Fuck)
  • 30Q 10S2P Battery 98€
  • Some generic charge only 10S BMS that I have lying around 10€
  • Firefly Controller (built a bunch a while back) 30€
  • Custom designed and 3D printed ABS enclosure
  • NRF52 Bluetooth module 5€

I was a bit impatient and started modelling the enclosure for the deck without yet actually having the deck. Stuff from China takes a while to ship and couldn’t just sit around waiting, so I grabbed the measurements from the eBay listing and started to block out a few designs.
This is the one I ended up with:


I’ll share the STL files to these after my build is complete and I’m satisfied with the result.

As the enclosure itself is larger than my Ender 3 print area, I had to split it up into two parts and fuse them together later with ABS Acetone goop. Knowing that I will acetone vapour smooth EVERYTHING eventually, I went nuts with the ABS goop, fixed any printing imperfections and sanded everything down once it had hardened and dried.

Once I did actually get my hands on the deck I was happy to find out that it actually fit.


Flipsky VESC 4.20 Dual Plus came in the mail and I just had to test the electronics to make sure everything at least powered on. Since my battery is still under construction at this point, I grabbed a few leftover 30Qs and made a makeshift 3S battery to test with. After the initial config everything seems to work and I have a peace of mind knowing that at least my VESC is functional.

For some reason I decided to go against the standard of siliconing the battery together and wrapping everything in fish paper and tape. Instead, I 3D printed a hard shell - you guessed it - out of ABS.

The 3D design has canals in the shell for balance wires. I’ll end up sticking everything in clear shrink-wrap once I’m done with welding the battery and BMS assembly. Just waiting for my nickel strips to arrive.

Printing these shells in two parts because I refuse to leave my printer unattended for safety reasons and printing it as one single piece would take too long at 100% infill.


Each 5S pack consists of two halves and have been fused together with ABS goop into one solid block and vapour smoothed.
Battery size test fit:

As for the remote, I’ve fallen in love with Solidgeeks Firefly remote and I’ve built quite a few over the year and even altered the design to my own needs, for example a custom PCB for both the receiver and transmitter and added support for vibration feedback in the firmware.


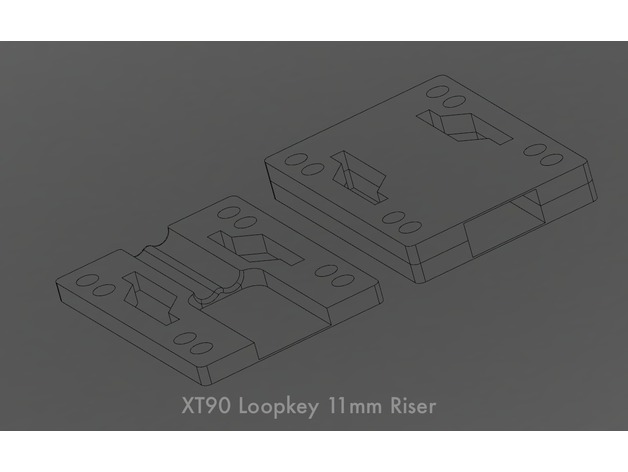
Recently I also posted a loopkey riser pad that I intend on using on this build, as I intend to ditch the power switch and use push to start instead. Only holes the enclosure will have are for wiring and charge port.


The enclosure still looks like crap, but since ABS is so easy to post process and treat it will be the final step eventually to add the finishing touches. My plan is to go all black and spray the deck as well.
To be continued… :slight_smile:

19 Likes

Timing…
Love this little build.

I was just sitting here planning a single drive 10s2p build and was thinking about enclosures. This is perfect.

5 Likes

Love the ingenuity with battery holder

1 Like

Nice design with the enclosure. What screws are you using to attach it to the board?

I have always wondered, can you run hub motors in BLDC or do you have to use FOC? Looks like a nice build. That tiny board makes those trucks look huge :smiley:

1 Like

Hubs are no different from regular outrunners. As long as they are sensored, you can use foc

1 Like

I’l be using generic M4 screws and threaded inserts to avoid drilling all the way through the deck. 7ply is quite thin tho I might not be able to sink these all the way in without coming out the top side.

The lip of the enclosure will be lined with this foam gasket. Bought a few meters for one of my previous builds but never ended up using it. It adds a few mm between the deck and the enclosure, so I’m yet to measure the exact screw lengths that I will need, but I’m set on M4.

I’m FOCing it up. :sunglasses:
The motors are sensored but I did have to convert the JST plugs to fit the VESC. These motors came with some weird plugs that I couldn’t find an adapter for in my box of spares. Also swapped out the crappy Chinese phase plugs for MR60-s.

3 Likes

Aa a fellow lover of small boards…fucking amazing dude

1 Like

I have a 7ply muirskate deck i tried to do inserts on… ended up drilling through the deck.
Just cover the top of the holes with something (jbweld? ) and grip over the patch job lol.

2 Likes

This is pretty dope! How did you manage to get your firefly remotes to be reliable? The one I built hasn’t been able to stay connected and I don’t trust ot to be reliable at high speeds. Is there something different you did with your design as opposed to the normal one?

Additionallly, the print that I have isn’t super great and the thumbwheel doensn’t feel sturdy. Did you change the enclosure design too, like adding bearings or something to the thumbwheel?

Did some wet sanding with fine sand paper as much as I could muster for like 30 minutes by hand until my fingers got sore. Couldn’t be arsed to fiddle with the enclosure any more.

After that I stuck it in acetone vapour chamber for a while to melt the layers together and smooth the surface.


The inside is a lumpy mess, since I didn’t care about it looking neat. No one will ever see it.

Next up: figuring out what paints to use. Need to paint the deck too.

I recommend these. Already shielded and allows for external antenna.

Made only changes to the lower half of the enclosure to fit the new PCB with new USB location and on/off switch. I’ve not had any durability issues with mine after I’ve acetone smoothed the ABS prints. If you use the 3D prints as is, I’ve noticed that parts snap very easily. I did play around with a tiny bearing but ditched it.

As you might have noticed in this thread - I have an obsession with ABS and acetone. :smiley:

2 Likes

Dude. That looks great.

1 Like

Yeah that enclosure looks amazing! I’ve done vapor bath work before and the results are super cool to look at. The sanding must have been annoying lol

That wireless module is just a drop in replacement? Did you need to recode anything or does it just work with the normal code? Additionally, whose version of the firmware are you using?

I think vapor smoothing the remote casing is probably a good idea, I bet it made the thumbwheel a lot smoother in its rotation

Solidgeeks, with a few changes of my own.

Yup, 100% drop in. No code changes needed.

My only gripe actually is the poor battery life with those tiny lipos. I’m in the process of tinkering with a few design ideas to fit a 18650 cell and replace the thumb wheel mechanism to a gyroscope/accelerometer (MPU-6050) type controller, with only a deadmans trigger. A more compact controller design to accompany the ‘ultra-portability’ of this tiny penny board sized deck, aimed at low speed applications. We’ll see if I ever get around to finishing it. :sunglasses:

Anyone have any recommendations on paint? I’ve been looking for truck bed liner paints but those aren’t that easy to find in Europe. Thinking of maybe using a matte black rubber coating, but I’ve experienced that it tends to start peeling off once it gets nicked.

1 Like

love that loop key riser!

1 Like

Hmm alright thanks for the information. I will have to try it out again. I like the functionality of the firefly I just don’t want to give up my zero-fault history of my Gt2b.

As for paint, I have hear decent results about plastidip for some applications although it can peel if it doesn’t adhere properly.

im surprised you went with VESC
I thought you’d use a hobbywing esc or something

Lots of oomph in this little guy :slight_smile:

1 Like

Welding time!

Damn welder keeps tripping my breakers. Had to go crawling behind my fridge to find the only power outlet that could even somewhat handle this stupid thing. Had to unplug everything else on the same circuit as well… :joy: I’ve blown fuses before with spot welders and it gets annoying very fast.
Regretting I didn’t go for a Lipo/Arduino welder instead.

1 Like

Depending on how your place is wired, sometimes you can ‘lock’ the breakers for a line open so it never trips

Apartment building. Pretty sure if I force my breakers to stay open I’ll start taking out my neighbours breakers on my floor, or worse. :joy:

“Don’t mind me! Just doing some casual welding…”

5 Likes