Just talked to ubox again. Their local postal service says the package is not China! Even though somewhere else it says its in Beijing. The packages don’t take this long to ship. They kept telling me to check with CanadaPost but I dont have tracking service for that package. It was supposed to be 2 weeks not 2 months. I think I need to buy another ubox  there goes another $300


Don’t do that, Ubox should send it for free, unless I miss something
No it’s Canada Post who lost it. The service is uninsured which I just found out now but I had to declare $30 for customs so its not like I was going to get the full cost back.
I’m back (hopefully better than ever)! Finally have an ESC again. You’ll see my build thread active again.
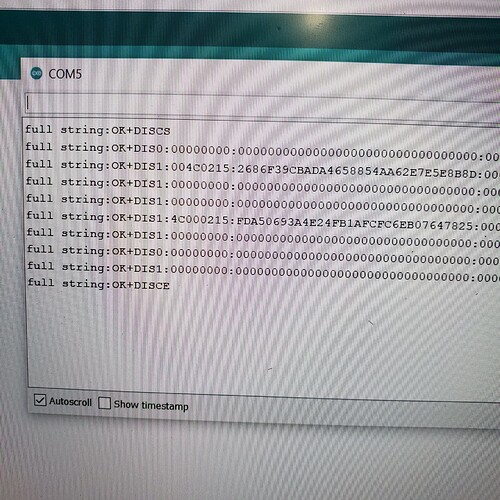
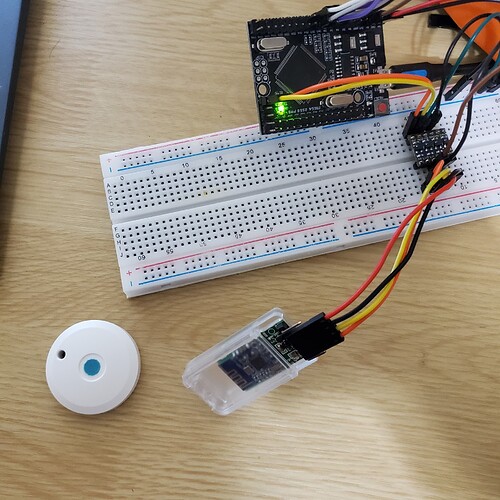
Working on parsing data from my Bluetooth module which is scanning for my ibeacon. Aka setting up security system so that board detects when the remote is in range. I was going to have my board security system work with my phone but I just learned/remembered that my phone doesn’t output BLE advertising. I think having it paired with the boards remote makes sense anyways 
Figured out how to use a bidirectional level shifter (in between arduino and Bluetooth module) 
 I didn’t supply power to both sides, I thought the shifter takes power from one side and converts it to the other voltage like it does with the data lines. Now that I know how to use the converter I’ll be using a second one in between the ubox and my usplit. I had fried my usplit 3 months ago because I gave it 5v. Now it will be protected
Once I connect my usplit I can setup the all the sound effects to actually work with the board. If you remember I demonstrated them before, but the tracks were just on loop instead of responding to the ubox.
Wahooo! I finally have the vesc talking to my arduino through the usplit! The vesc data sent to my arduino is in sync with the davega! Yay!
Next, I’ll plug in the speakers and switches to the arduino and see the voice feedback sound effects in action!
JARVIS IS ALIVE! On/off sounds with arc reactor in sync! This is a big milestone! Does it seem alive (like Alexa)?
In terms of coding the biggest thing left is making the touch screen talk with my arduino, won’t take that long. The biggest thing left in terms of the whole project is finalizing and printing my enclosure V2.
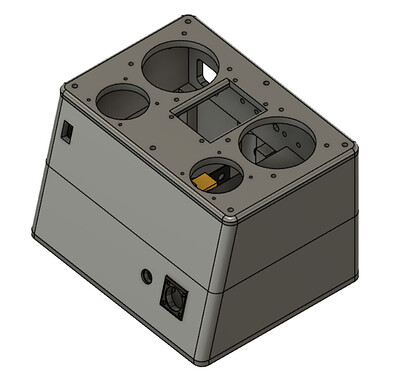
I think I’m close to finalizing my electronics enclosure V2. Might print small sections to test measurements. Definitely going to print a slice of the lid to see how the speakers and touch screen fit. Going to look through all elements of the design of this again because it’s been a while. It will be tedious 
Will be printing really slow (relative to what I usually do). This is how long it will take at 30mm/s: 5.5 days. Will use a full spool.
Printing a slice of the lid rn
I printed a section of my enclosure and found some problems. I think I caught them all now.
Printing the final enclosure v2. This is it. In 5 days I will know i just wasted a week and a spool or not 
 will still need to print the taillight mount and tpu remote sleeve after this. Also need to seal off the ends of the battery enclosure. Might just use silicone.
My touch screen is pretty much done. Figured out how to have it communicate with my arduino.
Serial (UART) communication is the best! Using it on all my arduino peripherals. Screen will control switches like the remote, screen buttons will update in sync with remote, if remote is used to toggle switches. Screen will also enable/disable security system. Can also change security password and it will be stored in arduino. I think I’ve looked through all edge cases to eliminate bugs 
Update on printing: 3days left
Update on code: I think my “OS” is pretty much done. 700 lines of code 
main functions:
-
button scanner - checks digital input pins connected to RF receiver module for remote button presses and for how long (using long/short press for diff switches).
-
switches - will look at button press data and flip the right switch + update switch panel on touch screen
-
ESC reader - handles all ESC data ex. on/off, speed, battery, distance travelled and plays the appropriate sound.
-
security system - if security system is on, will look for esk8 remote (using connected BLE module), will process scan results - aka if not found in a certain number of scans, will trigger security alarm.
-
nextion scanner - looks for input from the touch screen and processes it, sends back data to update touch screen too.
-
mp3 player - module communication w/ arduino. Functions here are referenced by other functions in order to play sounds at relevant events.
Done printing the enclosure and lid. About to print the 2nd floor:
About to print v2 of taillight+turn sig mount. There are two identical taillights. I think I will either have 1 always on (so always visible) and the 2nd turns on when braking - brake one tilted up 30deg so easier for cars to see when I brake. OR I will have both be at half brightness and full when braking. Not sure how I will implement the brake light, I have multiple options.
Printed the 1st taillight. works. printing the 2nd. Do you see the resemblance? 
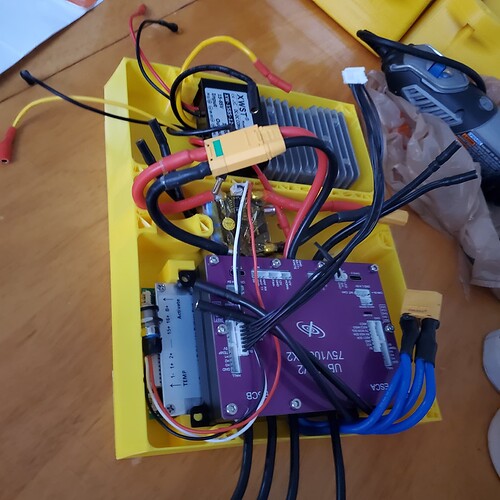
There are a lot of stray wires that I will plug in soon but this is so much better than the mess I had before! Everything has its own spot and is secured down! This box is really big though 
The next step is to plug everything in and fill up the whole box with everything. I will probably have to do a bit of tweaking to fully finish my OS but nothing new needs to be done besides a little bit to implement the brake light (hopefully).
I covered my enclosure in a coat of jbweld steel epoxy to strengthen it  After I make sure everything works, I will spray paint and wrap the enclosure in a clear vinyl wrap like my battery enclosure. Then I will replace the DuPont connectors with soldered connections and seal everything with silicone like the opening for the accessory wires at the back and the xt90s. After that, I will take my battery off of the board and print top covers (that I originally had designed) to completely seal off the battery with silicone to make it waterproof to a certain degree. With all the taping/wrapping I did to the p groups themselves, sealing the battery enclosure will really seal the deal
  and I shouldn’t have to worry about riding in rain or snow. I sealed my old board and rode in the rain+snow successfully.
My enclosure is spray painted and wrapped. I already tested the fit of most of the components. Need to put everything in and test the software I made. I sealed my battery today.
It was a challenge to apply silicone between the segment gaps.
Should be pretty waterproof now. I 3dprinted covers for the top and sealed them with ge silicone II.
I hope to go for a ride tomorrow  more pictures coming
Also charged the battery for the 2nd time. Group 3 tends to charge to higher V and deplete to lower V but it’s usually within 0.03V of the others. The other 15 s groups are usually within 0.005V.
I just spent another 5 hrs today working on the board. I thought I’d be riding in 3hrs  the main thing I did was put inserts in my enclosure and put the front truck and it’s accessories back on the board. Lots of other little things. Still more work to do but I’m hoping to ride it tomorrow. Again. At least everything I did today was successful. The biggest thing is testing my software and all the accessories together
  I plugged in a couple things a few days ago and that went well but I haven’t yet tested everything.
Unexpected detours. I had to extend all my balance wires, one of my motor hall sensor wires, and some other wires. They were just short of reaching the spot I needed them to be inside the enclosure. Total approx 30 wires. It’s taken several hours. The longest per wire was the hall sensor wires because they are so thin I had to do it very carefully. First floor is launch ready and tested. It’s rideable rn with 0 of my accessories, just davega and horn. Putting in the 2nd floor now…
Hall sensor fragility is the bane of my existence
I want to nominate this build for the Most Ambitious BOTY. This thread never ceases to amaze me  really cool stuff dude
That means a lot @glyphiks! I remember you weren’t sure if was it going to be rideable because of the 3d printed battery enclosure 
This right here is the bread and butter of a diy board. Glad to hear the battery is working as it should dude. In the spring when they shut down Lakeshore for active TO head down w ur board. Lots of pev enthusiasts and such a sick way to see the city. You’ll rightly get to show off this absolutely ridonk build 


