great thanks
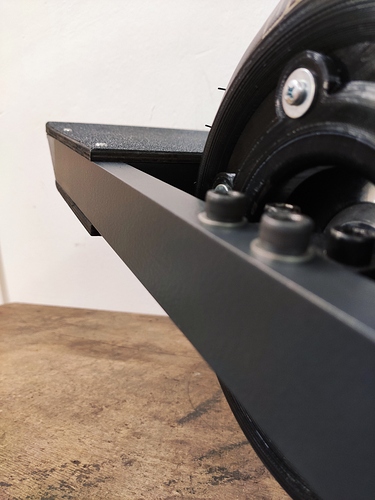
I just want to share my finished Onewheel.
It looks much nicer with some paint and it works flawless.
Hai Nathan here,
I enjoyed riding my DIY Onewheel for quite some time now. I encountered some problems, like water damage, so I was forced to switch my whole motherboard. Thankfully Hoverboards are getting really cheap now, I got a used one for €10.
So the reason I’m here again is because I would like to make a bigger battery pack. I still use the stock battery, but I got my hands on 2 Hoverboard battery packs and I would like to fuse them together.
The only problem is that I don’t have a spark welder nor a balance charger and I don’t have much experience with building battery packs . On the internet, a lot of people don’t recommend using a soldering iron, but it’s possible.
What configuration do you advice? @Bionic24 made a dual 6S3P in series, but is this still the best option?
Wow! I absolutely love the paint job, that looks amazing! Great job!
Hey Nathan,
I am using 2 Hoverboard battery packs in parallel (10s4p). They are cheap and easy to get. Also, it is easy to connect them together just by soldering some cables and they last very long.
They do fit very well in my built. I don’t know if it will fit in yours.
First this was my idea too, but unfortunately it doesn’t fit in my board. It looked like a 6S3P has less height, so that one will probably fit. Anyway thank you for your commitment!
If you remove the blue shrinking tube, you can rearrange the cells without needing a spot welder.
Just two cables from the BMS need to be extended.
Otherwise there are some mini Spot welders on AliExpress for example. Using a soldering iron to connect the cells is pain in my opinion.
I would never solder cells. My advice would be to get a good spotwelder (I use a malectrics) or have someone to make a custom pack for you (probably cheapest for just one pack). I am going to build a pack with p42a cells for mine when upgrading to Vesc. Will try to fit a 12s3p
Probably a dumb question, but is there a way to replace the opto sensors on these with velostat or pressure sensors?
if you add a microcontroller that could translate the analog velostat sensor to a 1/0 info it’s expecting I think
Edit: I use this technique on my own board and it works.
You rock!!!
I assume you made your own velostat? Do you have a favorite tutorial?
I used this one: https://www.youtube.com/watch?v=g-0dmToV4X4
Bionic said he aligned his motors, but I guess I don’t understand that if the hall sensors are spinning with the shaft.
Does he just mean align the magnets?
Omg… You seriously screw the motors into the 3D print??? Why??? Why not just epoxy or tape, or anything else?
So that’s where the alignment comes in? You have to make sure the screws line up with the magnets?
Has anyone had an issue with the tire not inflating where the valve stem is?
I installed a stainless braided valve stem, and am having nothing but problems with it.
Hey one question, I’m doing this same project, but I dont understand the function of the pedal sensors, on the hoverboard I have if a press on the sides to avoid the optical sensors to be activated, the hoverboard activates even if in theory my feet are not on the board, and this is where I have the doubt because I’ll try to add a footpad sensor but not sure how where should I wire the cables of my own made foot pad sensor and what should I do with the optical sensor. Appreciate the help!
Hi! I’m attempting to do this same sensor, but my question is what do you do with the optical sensors? in my hoverboard I have two on each side so you have 4 signals, should I just disconect them ? and connect the positive and negative wires of my sensor as you point on the image? If my circuit board of my gyros are a little different due to the manufacturer, where should I connect my footpad sensor? I mean what used to be connected there before on the original hoverboard so I can figure it out. Thanks
If you connect the wires as shown in @Nathan_3Dr88 post, you do not need the optical sensors.
The other sides of the shown cables should be connected to your footpad-sensors, so the circuit is closed by pressure.


