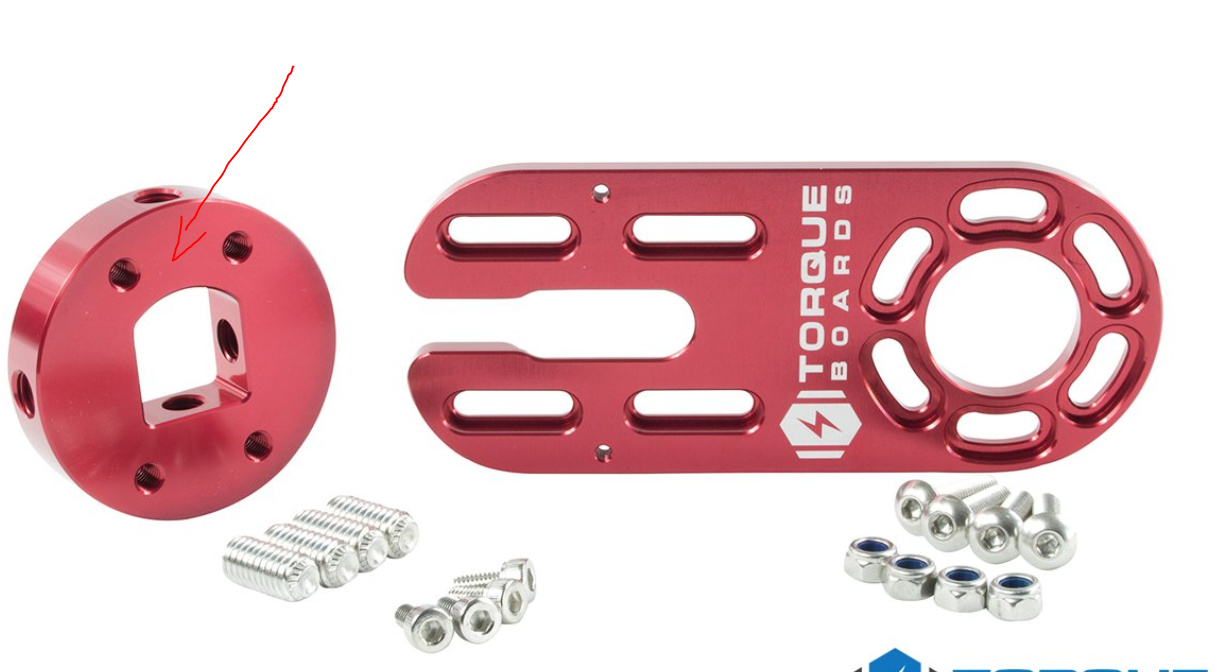
I’ve done it with x2 motors, just to test the concept. I got a little torque steer but the theory is sound. You should not be affected by torque steer if you keep the like KV monotos together.
2 Likes
While checking out the Hoyt St. remote I noticed the battery system they are using. That looks to the untrained eye like a good way to get a board onto airlines. I travel quite a bit for work. It sure would be nice to have something to do in the evenings other than eat and drink when on the road. Has anyone tried to DIY something similar, or just use the Hoyt packs?
3 Likes
I started to do something with 3d printed cases for lipos a couple of years ago, but I just cant trust a 3d printed enclosure. The Hoyt battery packs are pretty cool though, 10s1p in each one and they are stackable. @DerelictRobot can tell you more.
3 Likes
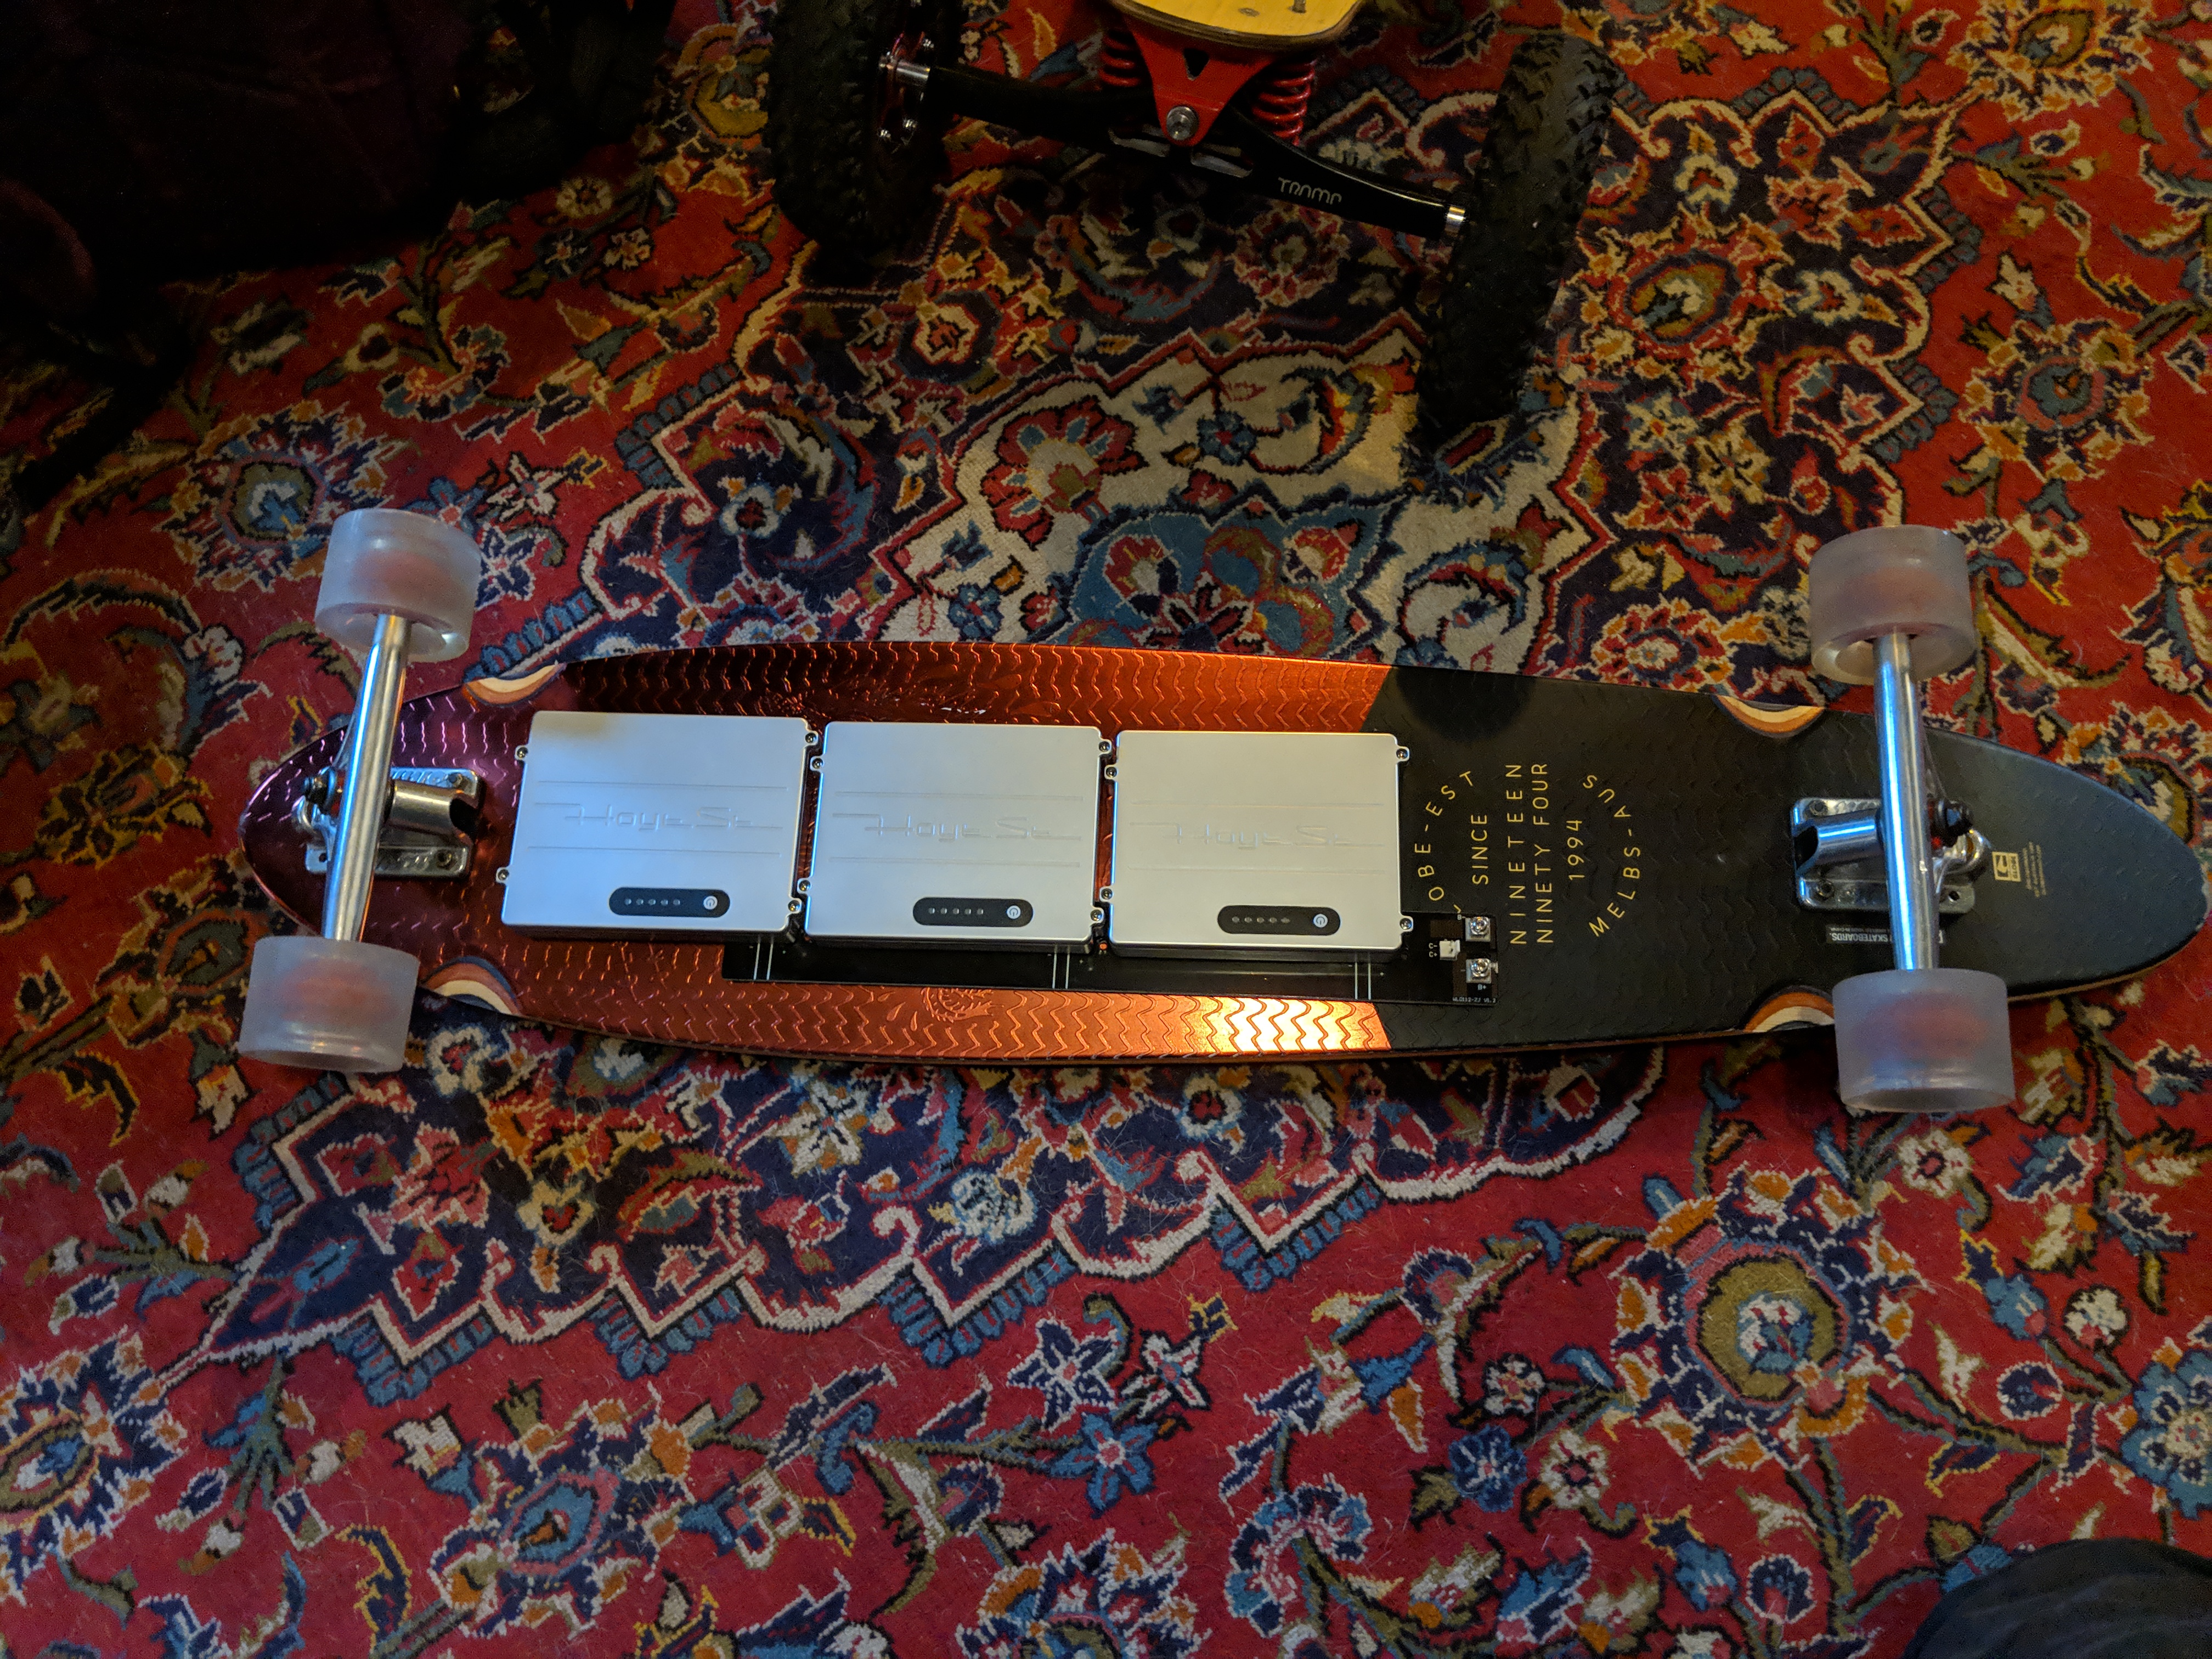
Was looking to do something much like that for a travel board. Theyre nice packs, each one has its own BMS and charge indicator. And airline safe.
6 Likes
How do they work from a connection standpoint? Is it reasonable to assume I can buy two sets and get good range by using three and swapping those out with the second set?
1 Like
They’re completely self contained in that each battery has its own BMS with a load balancing output.
You can simply hook them up in parallel to create a 10s1/2/3/4/5/6P battery. Charge and discharge is from the same 2-blade terminal. The batteries don’t come with the power distribution spine they use in their production board but I’ve got one handy im playing with.
1 Like
I was wondering about the durability of the terminals and mechanical attachments. Would they hold up to many installation/removals if I followed the two set plan? What is in the power distribution spine beyond the parallel connections? I am not going to hold up my first build for this but maybe it is an option when I have to replace the battery in my Evolve. I have about 400 miles on it. I haven’t noticed any degradation yet but I am sure it is coming soon. That way if an airline plays bumper cars with my board it is not the one I built.
Sorry for all the questions, but your reward for answering questions in the Noob thread is more questions. One of these days I’ll attend an event and buy a few rounds.
2 Likes
Two more Noob questions and I promise to give you all a break for the rest of today.
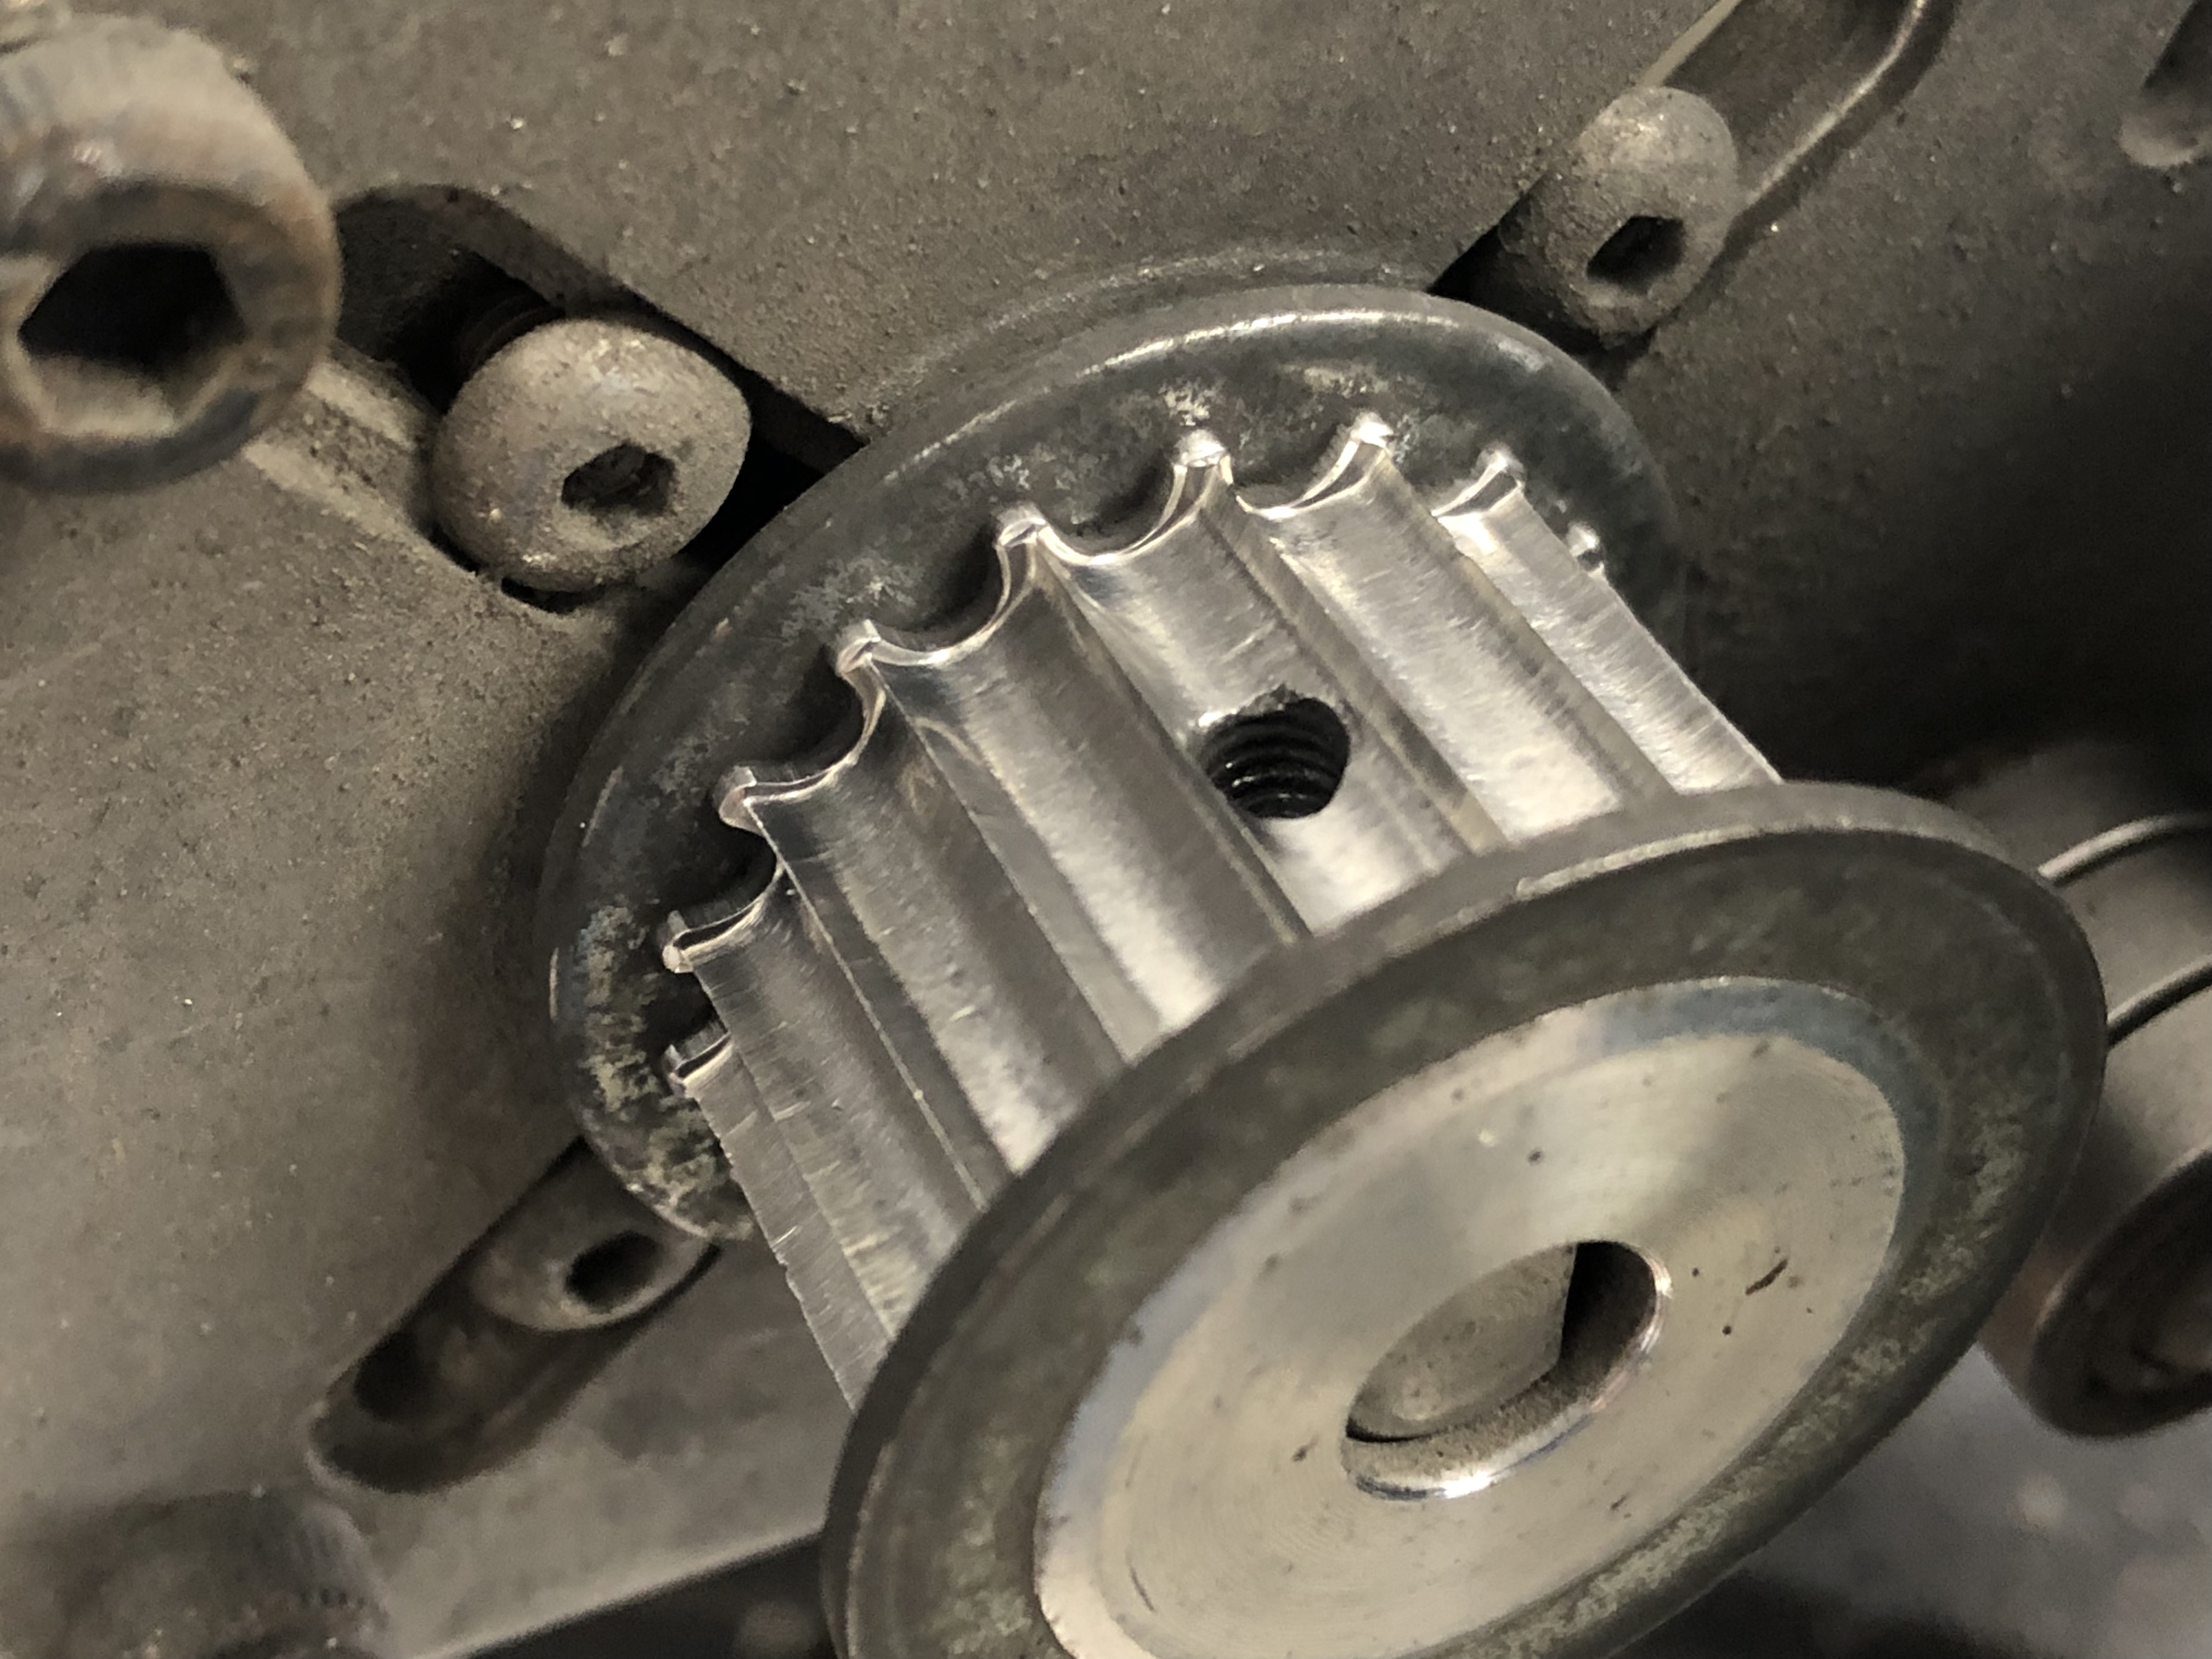
Does anyone really worry about having 6 teeth engaged in the belt calculator? That’s a nice theory but there are a lot of tolerances that would have to work out to have 6 teeth engaged simultaneously in the real world. It would force me to increase the center-to-center distance beyond what is absolutely required or decrease the gear ratio by increasing the number of teeth on the motor pulley.
Is it best to charge your batteries after every use, or better to let them discharge more? I do a 2 mile each way commute to work. Should I charge the board before I go out for a fun ride later in the evening even though it still has most of its range available?
The more teeth in mesh the better, less belt slip. Typically 5 it 6 teeth in mesh isn’t difficult assuming a 16t to 18t motor pulley. I assume you mean the motor pulley.
I think, and I in not sure, but I think it’s best practice to disagree to 30% then charge. 2 miles x 2 is nothing for even a 10s3p pack.
1 Like
Motor pulley you want it to be as large as possible. Under 15 tooth is not good as they wear out too quickly, once worn they have sharp edges and will slip shredding belts in short order.
I like 20 tooth but that usually means using a very low kv motor.
Idlers help but don’t totally solve the issue.
Worn pulley ![]()
2 Likes
If your going for maximum battery life it’s best to keep them between 90% and 20% full. It’s the ends of the range that degrade the cell life.
There is a study that showed you can double cycle life just charging to 4.1v instead of 4.2v
I charge at home and work and go between 4.1 and 3.7v
1 Like
Problem with that is finding a quality 10S BMS that balances at 4.10V/cell and is readily available and doesn’t do anything except battery management and a matching 41.0V 2A charger that doesn’t take a crap after a month.
I have yet to find those pieces.
So, until that happens, it’s 42.0V charging for me…
Is that the only way to do it? If someone stops a charge short of 100% the pack must still be stable. That means they must stay fairly balanced throughout the charge, at least close enough that there isn’t a big internal current surge if the charge is stopped. If that is correct and you can measure voltage you could do it by some simple automation to shut the power off to the charger.
Of course it could also be that any cell to cell current surge at all is more damaging than the last 10% of the charge.
Smart bms. You can just once program it to 4.1v and than disconnect any Bluetooth remote. Will work after like a normal bms
That fails the
requirement. I don’t want bluetooth on my BMS LoLz
Let’s dig into it…
Smart bms, here the data sheet to which values you can set it up:
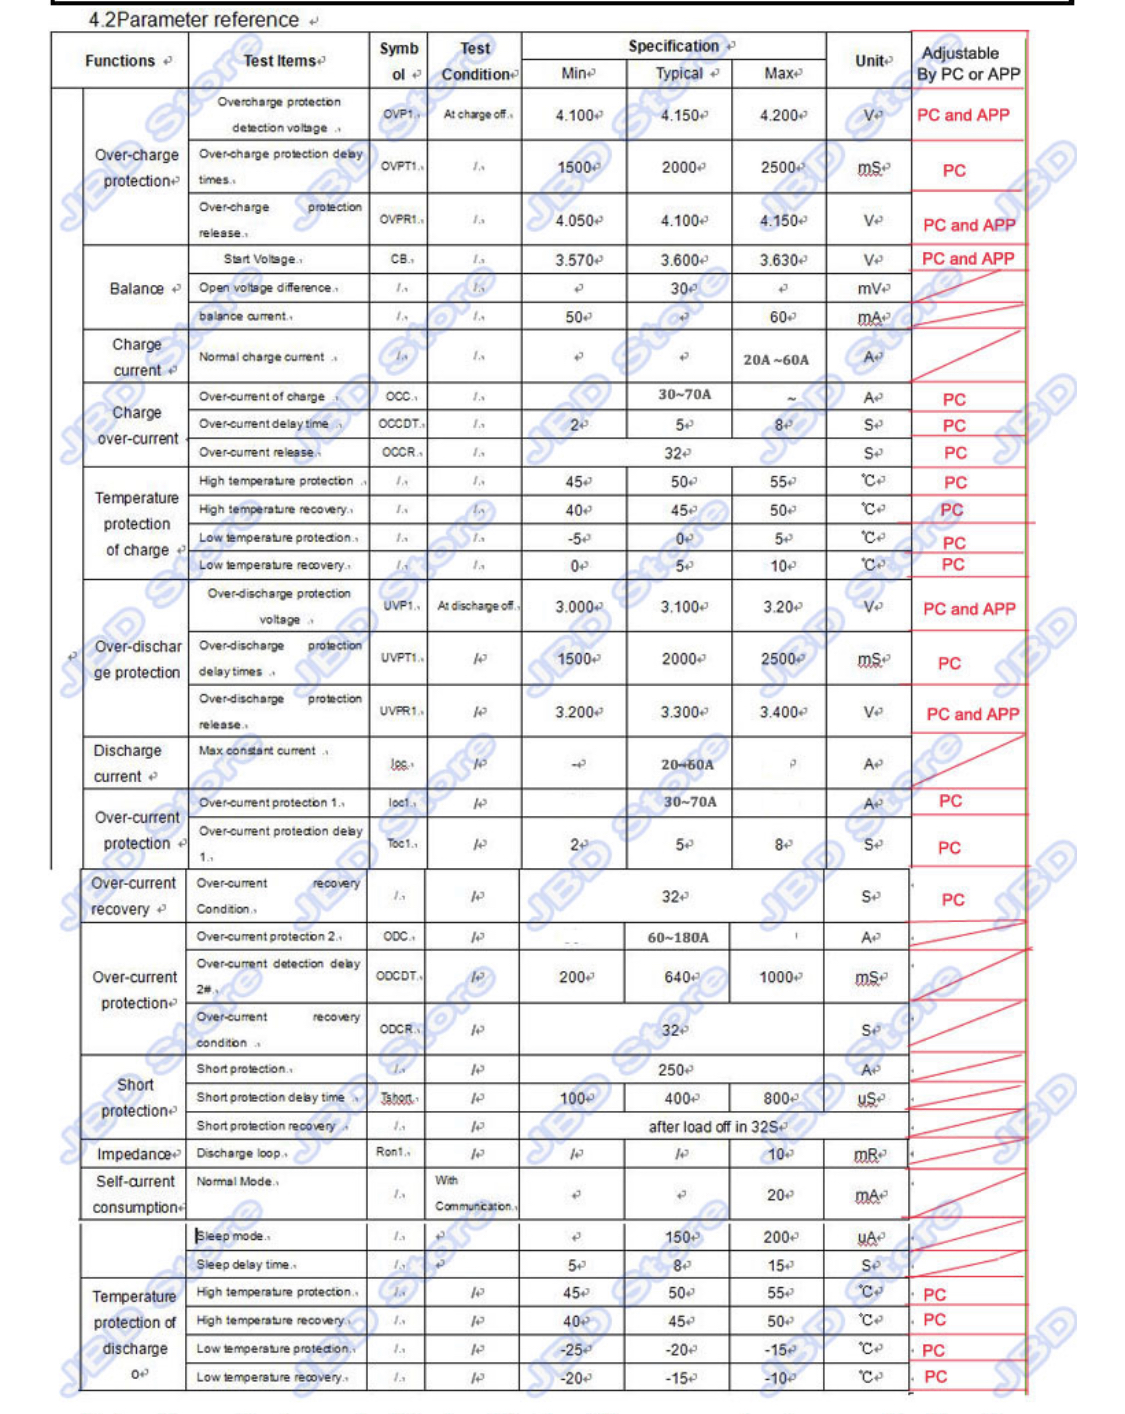
In case i set the overcharge protection to 4.1v and charge with a 42v Charger that should work, no? 
And as the bms start balancing at 3.6v that would work as well as long as the cells don’t drift too much and you use a slow charger.
1 Like
Oh man always the same…please read my full sentence. The bt module is connected with a jst. You can just fuck forget about it. Nobody need it. Get a programming cable and set once the values you want to have your bms at and you good. No bt, nothing. Just a fucking bms like the once you use right now in your boards.
1 Like
I want things in the BMS hard-wired with resistors and stuff. It’s a failsafe circuit for a reason LoLz
I’d prefer less failures over a longer battery life.