Yeah true, I found a nice model but I simplified it too much, I’ll try something else
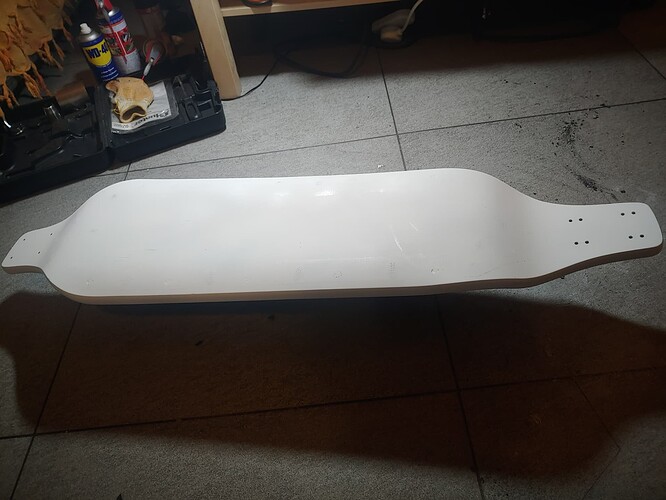
After sanding :
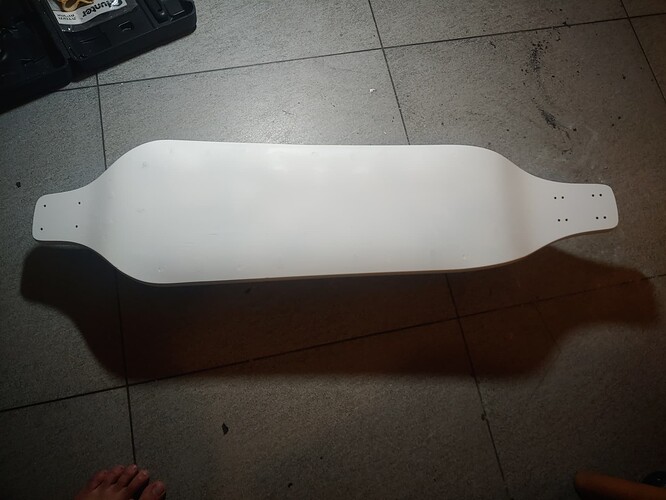
After painting :
After a good bit of hand-sanding the filling, I decided I absolutly didn’t want to sand the whole board this way, (sorry @ApproachCautiously )so I just got going and here it is after three layers of white paint.
Not bad, I maybe should have used more filler, I can see some scratches in the deck after the painting, but I can’t see nor the original color nor the og graphics.
I used special heavy duty paint which claims to have twice as much pigment as regular one, I’m sure it helped, but most of all it doesn’t smell at all, I’m pretty impressed.
Tomorrow I’m going for the new graphics and clear coat as soon as it is dry.
Edit: sorry for the feets, my wide angle always betrays me
I always chose to sand while watching something else and with some alcohol to make it more tolerable. Did the same when sanding old paint off aluminum and prepping the surface for paint which took hours. It is also what got me through sanding this very nasty but very hard deck back to the bare wood: 🖼 Pictures and Nothing Else! - #12433 by ApproachCautiously
It is titanium white which is already a very strong opaque pigment ![]() There is no need to add more of it to begin with.
There is no need to add more of it to begin with.
As for being heavy duty, it doesn’t matter that much if the paint is coated in some other layer of protection. If you’re not sealing it in or coating it with a clear coat of some form, then it will matter since it needs to protect itself.
For comparison, my deck was painted with expensive acrylic paint (cobalt teal is not a cheap pigment) and then coated with a polyurathane clear coat to seal it in and protect it. Aside from me accidentally starting to strip part of it with alcohol, it holds up well to use. It can be dented slightly when installing the enclosures and trucks but it isn’t an issue since you don’t see it when in use. Kind of a pain in the ass to clean though
The white looks so clean dude!
I see an orbital sander though ^^’
truth is I had a heck tone of tools, but nothing that is able to sand properly, and I didn’t found an accessory that could fit my rotary tool,
could have order on internet but would have taken a month or two to get here,
so I just use some sandpaper ^^’
But yeah, good music and alcool helped a lot.
Interesting, I know very little about pigments, I just took the expensive one instead of the cheap one on the shelf for one ^^’ I should read more about color, my art courses are far behind
Which was purchased on the same night that I took the first progress pic after sanding ![]() I also got a nice discount from Lowes’ and only payed the cost of the sander (as in what the store payed for it) since they price match Amazon but the one listed had a slightly different sku even though they were identical otherwise. I think they can still price match bellow cost when it is the exact same SKU.
I also got a nice discount from Lowes’ and only payed the cost of the sander (as in what the store payed for it) since they price match Amazon but the one listed had a slightly different sku even though they were identical otherwise. I think they can still price match bellow cost when it is the exact same SKU.
My drill battery was fully discharged and this was as far as it had gotten me. Doesn’t help that it isn’t a very powerful drill to begin with.
Using a rotary tool would have been a horrible idea since it would cause issues with getting a level surface. I only use one on aluminum since it would be impossible to use my orbital sander on them.
The price for the paint was hopefully all in the rest of the paint and not the pigment. Also no worries about needing more art courses as I only know that bit of information from practice and not from courses. I do have an Associate’s in Fine arts but they didn’t teach that there ![]() also it is completely normal to have an AA in Fine arts but then a BS in physics and MS in engineering. I’m definitely not the weird one
also it is completely normal to have an AA in Fine arts but then a BS in physics and MS in engineering. I’m definitely not the weird one
I’ll give a look at those sanders, for when I’ll be a bit less broke ^^’
don’t worry, I’ve been a researcher in architecture, my grandparents (and most younger people either) just cannot accept the fact that an architect has to do with software devellopment and drones ^^’
I got this a couple months ago, have yet to find a use for it though. Has good reviews
DUDE i would KILL for a guide on how to do this. I wanna paint my kaly mountainboard deck white (sounds like a really bad idea but i dont care)
To be honest I just felt the need to clarify since otherwise it might look like I’m claiming to have an education that I don’t have given the spread of degrees ![]() The fine arts was and isn’t really related to the rest and I can’t really say it has been helpful while getting the other degrees other than maybe having nicer drawn diagrams but that gets ruined by my handwriting.
The fine arts was and isn’t really related to the rest and I can’t really say it has been helpful while getting the other degrees other than maybe having nicer drawn diagrams but that gets ruined by my handwriting.
Many elementary school kids have better hand writing than I do
Yeah I’m in love with with decks since I’ve seen the og trampa ones and some LY decks with the clear white edges.
I don’t know how much it would stick on fiberglass deck, not sure if every paint would work but you can.
The important thing is to use some top coat after it’s dry so it doesn’t peel away.
First thing you clean the deck with alcool, it needs to be perfectly clean and dry.
Then you need to use the paint spray fast, and from 30 cm away, you don’t want to have “wet” spots on the deck from the paint, it wont be homogeneous from the start, better do 3 or 4 light coats than one heavy one, with at least one hour between heach.
(Do that outdoor so you don’t die from the smell, but beware of falling leaves/dust/curious cats)
Then 24 hours after clear coat on top. And some more 24-48 hours for it to dry
Edit when you paint it, put something under it, in the middle, so all of the edges are at least 10-20cm from the ground, because you want to paint the edge too.
You need to be able to circle around it when spraying, dont be static.
Also you’ll need sacrificanle clothes and newspapaer because your going to have a big cloud of paint falling on everything arround.
Edit 2 : my cat is dead scared of the hissing sound of the spray
Sorry to all if the voters but I decided to try something much more complex, I’ll keep you up to date soon
cries in bench grinder, sewing machine, and pocket oscilloscope
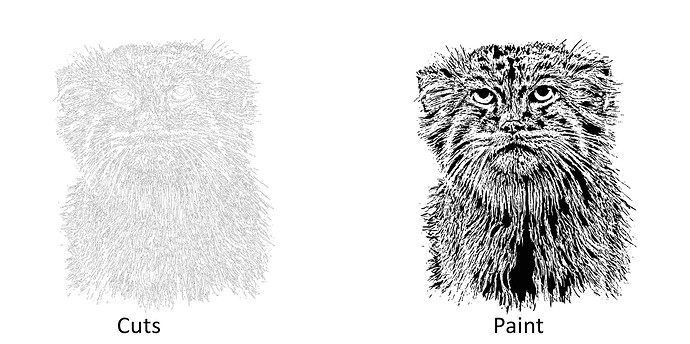
I found an impressive pallas cat drawing on the internet
(credit to the man, he deserves it : https://slasan.com/work)
I did a bit of fiddeling on photoshop so I could get a workable model for lightburn
The difference isn’t obvious like that, but there’s actualy much less shadowing and grey details, remains only black and white forms,
Then I extract the contours of the black shapes to cut as vectorials on lightburns
Here we are, first stencil cut test,
here’s a time lapse of the one hour of cutting,
pretty clean, could work, but the cut isn’t deep enough, should change the settings or do more than one pass, I’ll try that tomorrow.
Here is how the sheet actualy looks like :
(PS: I lied, this is an accelerated video, not a real timellapse)
Yes. This is extremely important. One of the main mistakes people make when spray painting something is applying the paint way to thick each coat. You want to do many thinner ones. I personally do many sets of very thin coats and wait maybe 10-15 min between each.
Regardless of where you do it you should wear some kind of respirator. I’d recommend putting whatever you’re painting in a box to help with overspray which could allow you to do it indoors in some cases. The point about things/animals falling in the paint is a good one. Dust and small insects love to ruin your day after you’ve spent an afternoon trying to make something visually impeccable.
The cutting went better than I expected, not all of the pieces holds together but it looks ok
I put the stencil in place, seems ok too, I felt like an archeolog puting the few pieces back in place with tweezers
I did spray one layer and I wont be able to put another one because the spray was almost empty so I had to use it not in the best way possible and some of the oieces started moving… In 20min when it’s dry enough I’ll take the stencil aways and we’ll see how much I screwed it up
It’s far from perfect, but it’s definitely not that bad.
Lacks only the clear coat and I’ll be done woth the deck restauration
ok, the last coating of top coat is drying, it’s time to move to the next step :
the main thing will be the enclosure, but I’m a bit reluctant to start working on it before I got the battery, so let’s see that later I have a lot of idea on mind for it already.
so what’s left :
- Bat (waiting for the cells)
- Enclosure (I’ll start moddeling it already but waiting for the battery)
- X-thingy
- Cabble management (I have my idea for this one, and it includes repairing my 3D printer)
- Digging out the electronics from my never to be tayto build
so, because it’s funny, and I’m still inlove with the black and white deck :
Step 2 : X-thingy
I have laying arround some white delrin sheets I got some day when I was over enthusiastic about making things and never did.
Today is the day.
I’d love to router it, but I don’t have a router, so I’ll dremel them.
My experience with the dremel isn’t impressive, mostly because it’s not a real dremel but a huge ass aliexpress’ rotary tool and I’m half scared of it.
I used it to cut aluminium sheet back a few years ago, I’m sure I’ll be fine routing 3mm of delrin.
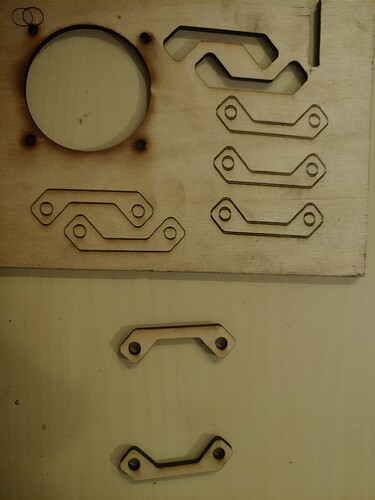
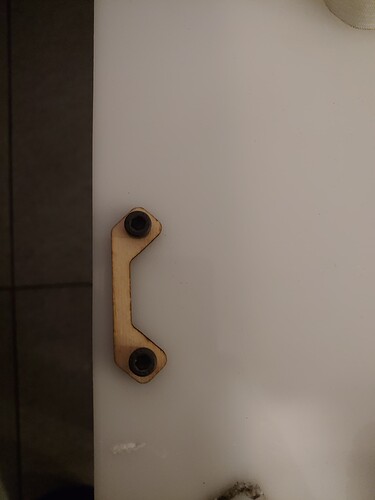
here is the plan : I’m CADing a sweet x-thingy, lasering it into plywood and using it as a jig to route the delrin, let’s go
