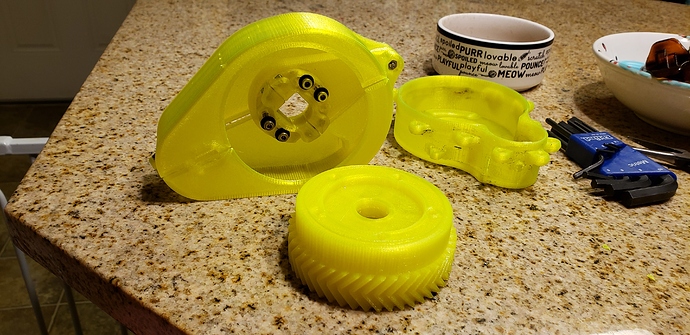
Yeah, I guess I’m specifically referring to surface hardness as determined by an indentation test (like Rockwell or brinell). I would say that the tests he performed were bending tests that measure tensile strength. Either way CoPa still seems amazing, and if I can stomach the cost would definitely be worth testing.
Dunno how much help I can be since you guys seem to have testing and shit down to a science…
I ran Nylon + PETG wheel herringbones for a few months. The gears were like 22 or 24mm wide, and the herringbones had flat sections of like 3mm between each of the helical sides…
I never had any issues with gears failing and wear was great, especially with grease and lubrication.
The two issues I’ve had, one of which you’ve solved, is motor gear coming loose on the motor shaft, and road debris.
Even with my shitty but sealed as best I could 3D printed enclosure, debris would get in and little pebbles would chunk up into the gears and cause problems. Fully exposed gears were great, but same problem with road debris.
I’d say, figure out a way to seal these gears really good and you will be able to get the rest to work well with some combination of materials.
Mobil 28, Aeroshell 22
Same situation. The price is holding me back until I get a bit more info. I have a standard esun nylon that I have been printing gears with it and they are still fine. So I can only aspect CoPa to do much better.
@Skatardude10 dude! That’s awesome! Those are some wide gears, mine are only 18mm wide and I will probably drop that down to 16mm for a dual drive. That gives me a lot of hope that yours did well. My mini-spline motor connection has had zero issues whatsoever so I think we can count that problem effectively solved. Also, I think making a workable printed gearbox should be doable. My gearbox right now is super janky, because I didn’t want to invest in getting mounts machined so I just made an enclosure that would work with what I had so I could test enough to see if the idea was viable or not, but based on my experience so far and your success it is probably time to design a proper gearbox. Thanks for sharing your experience. Do you by chance have any pictures or anything you can post?
@moon thanks for the grease suggestion, I will get some on order tomorrow so I can get back to it.
That’s all I could find for now. Tried a couple different designs and decided to go simple. The simple ones towards the end worked best, but really I think any enclosures need to be stronger, or at least flexible and bulky at all the connection and mounting points, made with nylon.
Yeah man that’s awesome! You went to town on those gearboxes, the hinged design is pretty cool. I’m thinking the gearboxes I end up using will be very boring, very similar to all of the geardrives out there right now, only with a printed cover instead of a CNC’ed cover. I feel like it is the simplest and strongest, and makes it possible to add a v-ring seal. I can’t believe you fit a dual drive with 24mm gears…
Also, it looks like you remixed my printed hubs (which were just a remix of @Maxid hubs) for that build? Haha that’s awesome.
Oh shit good catch, yep! Made a few changes, beefed up the side rim things quite a bit, they served me well while I was running them… mostly ran them belted.
Nice. yeah I like the side ring mod. I’m glad somebody got some use out of the model.
For funsies, I just started building my own variant of this theme as well!
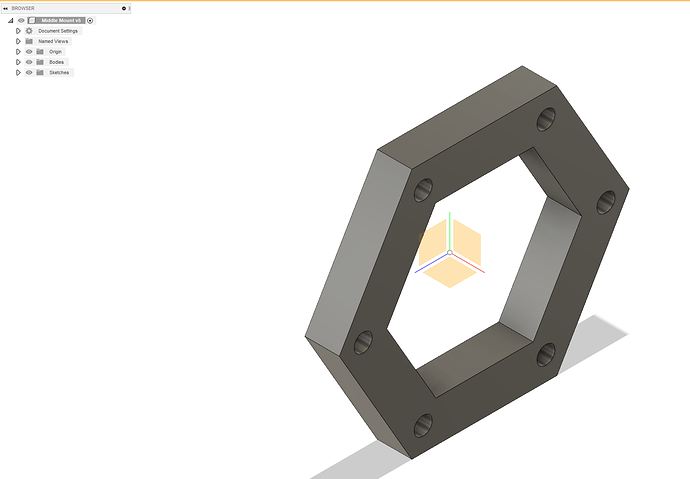
That’s the Fusion360 modeled parts.
Here’s a video of the very first prototype:
3d printing the mount as well…eh, this is just PLA so far… ;D
Looks good!  what material do you plan to use for the final version? And better balance those wheels before you really start using the drive, the oscillations put way more wear on the drive especially on 3D printed gears.
I bought some NylonG specifically for playing around with on this project. I don’t know that I’ll ever actually make two of these and put them on a board, but it’s been a fun learning/modeling experience.
You should add a bearing to the design, so that the gear will run as true as possible around the axle. It sound like the gear is just a tad woobly now, which creates a lot of unnecessary wear and noise.
At the very least if you dont plan on using it yourself, I would suggest posting it to Thingiverse for others to possibly experiment with. It would be an excellent addition to the community.
My first board was built using a 3d printed motor mount, hub and pulley - they run strong and dont seem worse for wear after about 50-100 miles. So in the same vain id be interested to give these a try as well and help open up the community to cheaper(eh?) drive options for less “balls to the wall” builds.
not so muchfully 3D printed, used Nylon and PETG with metal TB mounts. Before this I did quite a few different straight and herringbone gears without covers that worked great for a while… the biggest issue was rocks and debris getting in and mucking up the gears. The enclosure on this one didn’t work so well to contain the gears enough as you can see.
I do believe a fully 3D printed drive can work well… I just gave up for now. But man, did they ride well when they did  Honestly, I got a lot better reliability using no enclosure, as the enclosure tends to catch and trap more debris than the bits that might happen to get caught in the gears just right and spit back out immediately.
Following this thread, good luck!
You’ve definitely got a leg up on my fusion skills, I suspect ![]()
I don’t have a huge problem with that, but most of the mount is custom to a given truck and the gears aren’t special (there’s a plugin that does it). Also, it’s only a single ratio. So…kinda rather specific. There are a few designs for this on thingiverse already, which I definitely used to ensure I wasn’t going off the rails, but they also only work in fairly specific applications.
Good idea; I see that Skatardude10 also had theirs setup that way; I’ll look into it.
@ptowncruiser / @Skatardude10 : I’m curious, what gear ratios did you go with? And what values for your helicals?
The approach of using an existing pinion gear for the printed one is intriguing – certainly would reduce anxiety around the straight filament-on-shaft, but that seems to have not been a problem for you, @Skatardude10?
I’ve had trouble coming up with a setup where the larger gear doesn’t interfere with the closer in motor mount screw points – ie, it covers them up.
Where did you find that? Got any pics/models? So far mines been kinda terrible and I think it might be one area where metal is going to be not-optional.
These both look super rad!! 

I found one on the old Esk8 forums, but made some changes to it myself to better suit how I wanted to use it. The idea here is that this would likely only be usable on trucks from MBS that support an auxiliary break system since its mounting point will be using that m8 bolt hole for the threaded rod that goes through the vertical of the motor mount. I havent had any issues with splitting, but i printed this specifically to account for that, therefor the layers are lateral to any of the force that would be applied to the rod. thereby giving the layers as good a chance at fighting separation as possible.
The reasoning here was that this board needed to be as cheap and easy to fix as humanly possible. So the use of 3d printed parts and off the rack threaded rod from any major chain hardware store (Lowes, Home Depot, Mac Hardware, etc).
I cant take any credit for the idea since it wasn’t mine, if i can find the guy that made it ill link his thingiverse. That said the Motor Pulleys were mine after going through several iterations of ‘set screw’ style 3d printed pulleys i found that any torque shock would be transferred to those setscrews and blow apart the layers. So i modeled a exact fit shaft, and then shrunk the print by 1% to make it a ‘installed by heat only’ method. havent had any of them break on me since.
Is that a heat gun on the shaft or to the part? I’ve seen inserts installed by using a soldering iron to jam them in, but this is a slightly different setup…


